
Your Fullscript Storefront is a shareable page where patients can browse and purchase the lab tests you choose to offer. You can add tests, panels, and specialty kits from the Fullscript catalog, organize them into sections, add optional custom fees, and share your full storefront or individual lab links.
Patients can browse your storefront without a Fullscript account and purchase a lab without enrolling in a plan.
If you're coming from Rupa, your panels and bundles transfer automatically, so you'll refresh your storefront rather than rebuild it. See Moving from Rupa's Labshops to Fullscript Storefronts to learn what transfers and what happens to your old Labshop.
If you already use Journeys, your Journeys section also lives in My storefront. To learn more, see Managing your Journeys storefront.
Storefront labs vs. lab recommendations
You can list a lab in your storefront so any patient with your storefront link can browse and buy it, or send a lab recommendation directly to one patient as part of a personalized plan. Compare the options below to decide how to offer a lab to your patients.
Storefront lab | Lab recommendation | |
|---|---|---|
Who can order the lab | Any patient with your storefront link. Storefront labs can’t be hidden, made private, or saved as drafts. | Only the patient you send it to. |
Patient questionnaire, interpretation, and plan | Not included. | Available for eligible Quest panels. Your patient answers a short health questionnaire, and you receive their results with a draft interpretation and plan for you to review. |
Sharing results | You’re notified when results arrive. You review and share them unless you’ve turned on Share storefront results automatically in Labs settings > Results. | |
In-office blood draw | Not available. To collect the sample in your office, send a lab recommendation instead. | Available if you’ve set up in-office collection. |
Set up your labs storefront
You can have one storefront per Fullscript account. Start by completing a few required setup steps. Once those are done, you can start building your labs storefront by adding tests, organizing them into sections, and customizing what your patients see.
Set up labs in your storefront | Video
Complete the required setup
When you first go to My storefront > Labs in the left navigation, you'll see any setup steps that still need to be completed.
- Register for labs: Required if you haven't already registered. See Registering for labs for more information.
- Opt-in to the Authorization Network: Required to offer labs on your storefront. The authorization network fee is $9.50 per panel or specialty test and is charged to the patient.
- Customize storefront branding: Personalize your storefront with your practice name, logo, storefront URL, color scheme, and other details patients see when they visit your store.
- Payout settings: Set up where you'll receive earnings from custom fees by completing your payout information.
Setting up a labs storefront under your own license isn't currently available.
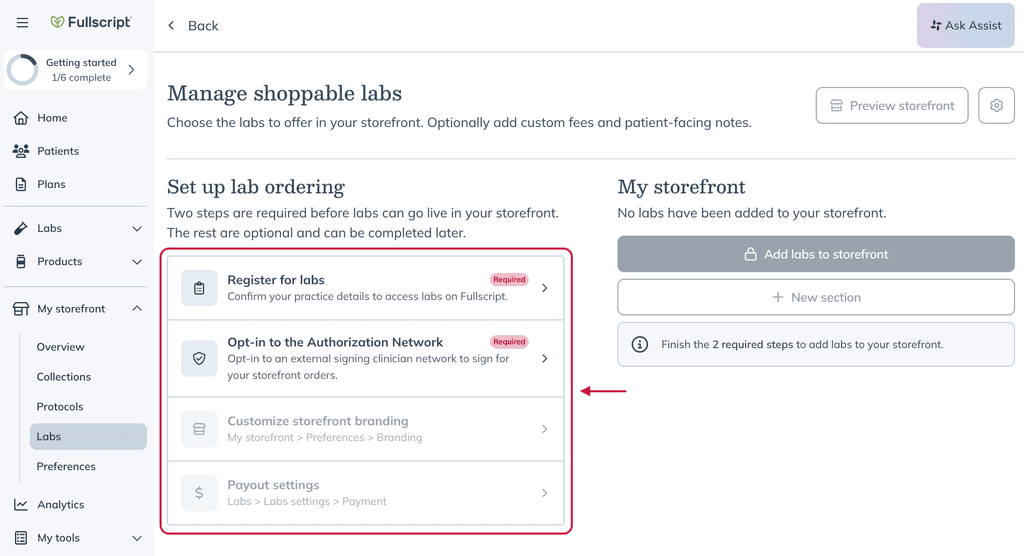
After completing the required steps, select Add labs to storefront to get started. You can complete the optional steps now or return to them later by selecting the settings icon in the top right of Manage shoppable labs.
Add labs to your storefront
Once setup is complete, you can choose which labs patients will see on your storefront.
- From My storefront > Labs, select Add labs to storefront.
- Search for a lab or browse the catalog.
- Narrow the catalog using filters such as Company, Health category, or Test type.
- Find the test, panel, or specialty kit you want to offer and select Publish to storefront.
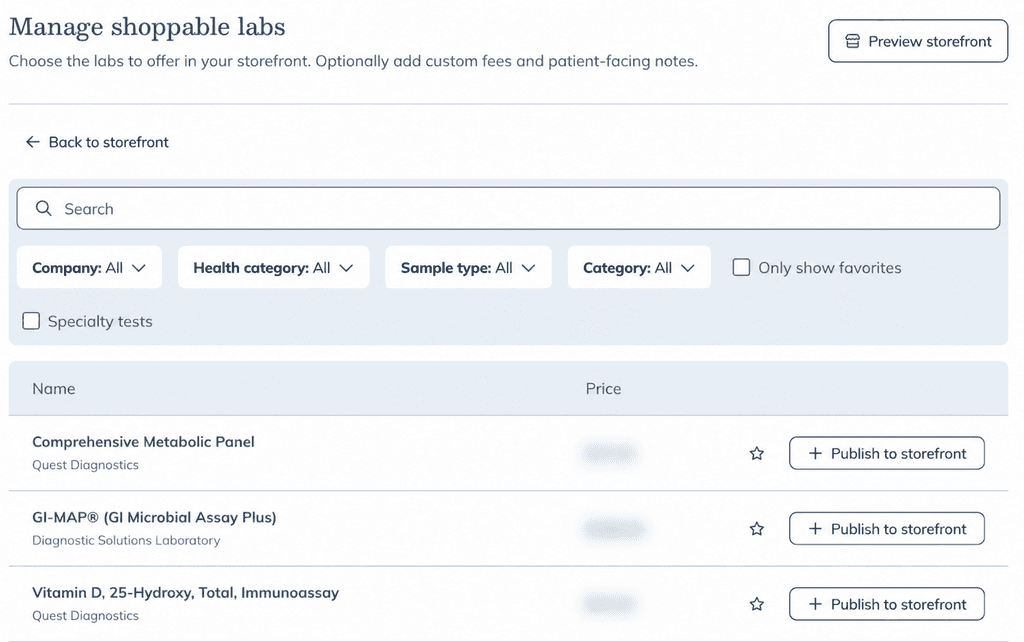
Customize a lab
When you select Publish to storefront, the Lab test details drawer opens. Use this drawer to customize how the lab appears on your storefront.
You can:
- Update certain Test names.
- Add a Description, or select Use default description.
- Choose a Section.
- Add an optional Label.
- Add an optional Custom fee and choose a fee name.
Select Publish to storefront when you're finished. Changes are published to your storefront immediately.
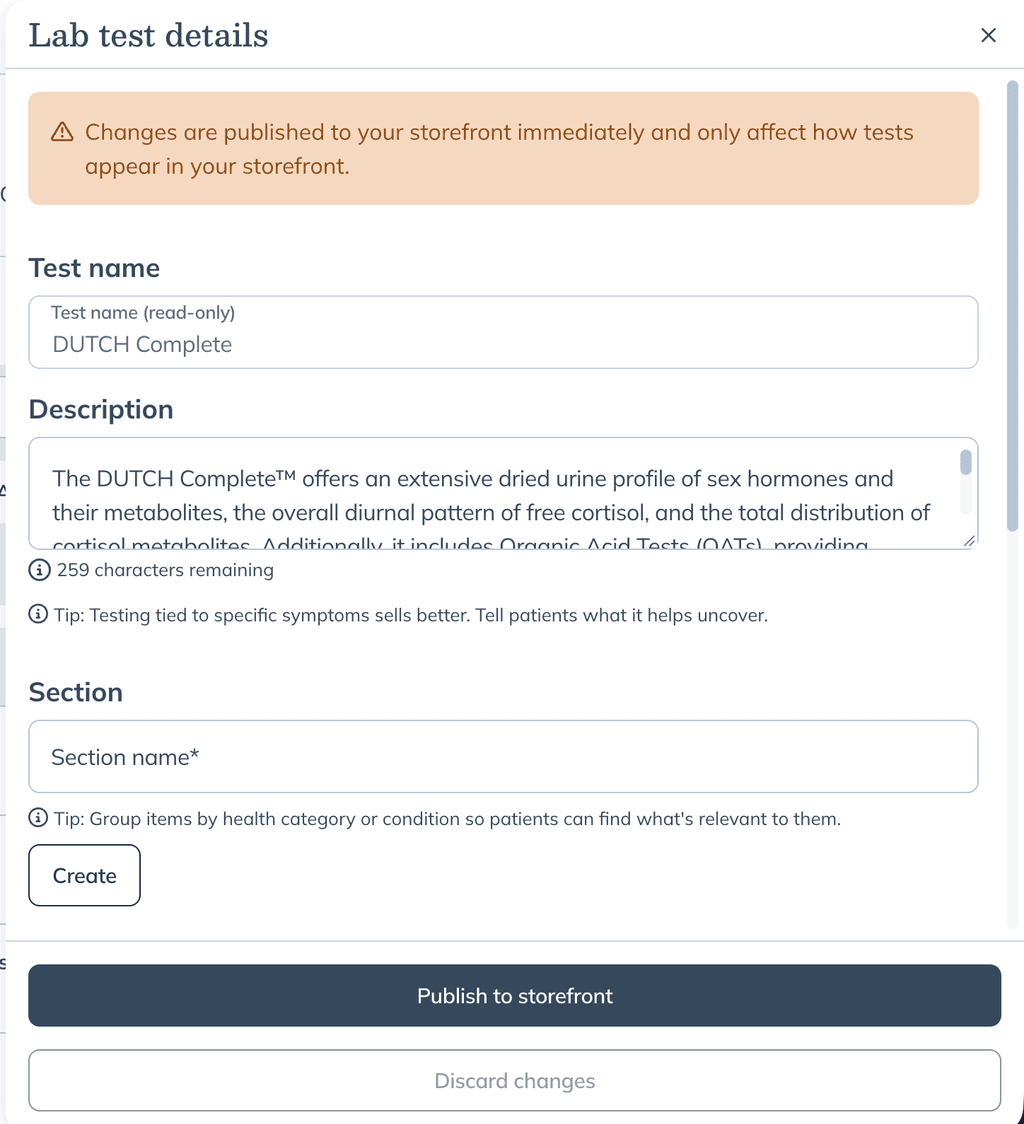
Custom fees are set separately for each lab and are always flat dollar amounts, even if your default custom fee in Labs settings is a percentage. For storefront orders, custom fee payouts initiate when the requisition is created. Learn more about custom fees for lab orders.
When you're finished adding labs, select Back to storefront to return to your storefront and organize them.
Organize your labs
From My storefront, you can organize the labs you've added into sections.
- Select New section to create a section.
- Drag sections or individual labs to change the order in which they appear.
- Select Edit section to update a section.
- Use the icons next to a lab to edit it, copy its individual link, move it to another section, or remove it from your storefront.
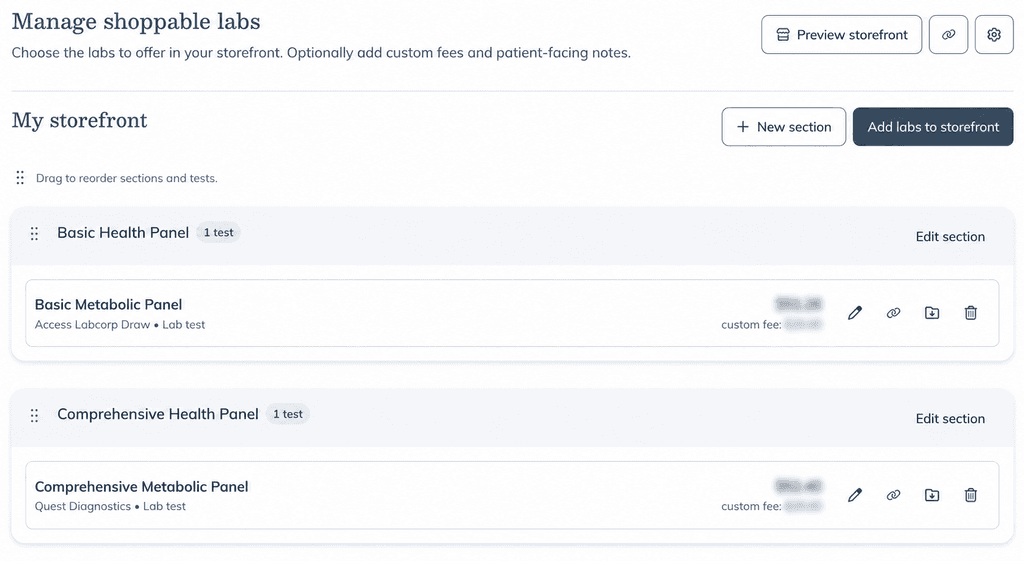
Share your storefront
Select the link icon next to Preview storefront to copy your storefront link. You can also select Preview storefront to see how your storefront appears to patients and copy the link from there.
To share a specific lab, select the link icon next to the lab. This opens the lab’s patient-facing storefront page, where you can copy the page URL to share with patients.