
Using the plan building tool, staff members can create or finalize plans on behalf of practitioners in the store. This feature can be especially helpful for multi-practitioner clinics where staff and administrators help wrap up appointments with patients.
During this wrap-up time, staff can help patients sign up for Fullscript by adding them to the store or by creating or resuming a plan started during the appointment.
Video: Building plans
Creating new plans
To create a new plan for a specific patient:
- Click the Patients tab.

- Use the search bar to find the patient you’re creating a plan for and click their name.
- Click Build plan on the patient profile and choose what you’d like to start with.

- Select the practitioner you’re building the plan for and click Start plan.

While it’s possible to change the assigned provider later in the plan writing process, you will need to start the plan over if you choose to do so after this point.
- Build the plan for the patient, including any products, resources, or labs necessary.
- When you’re ready to finish the plan, click Review draft.

- Complete the plan by adding a message snippet, lifestyle recommendations, adjusting the dosage instructions for the necessary products, and including any relevant resources or documents.
- Once you’ve finished the plan, click Send to patient.
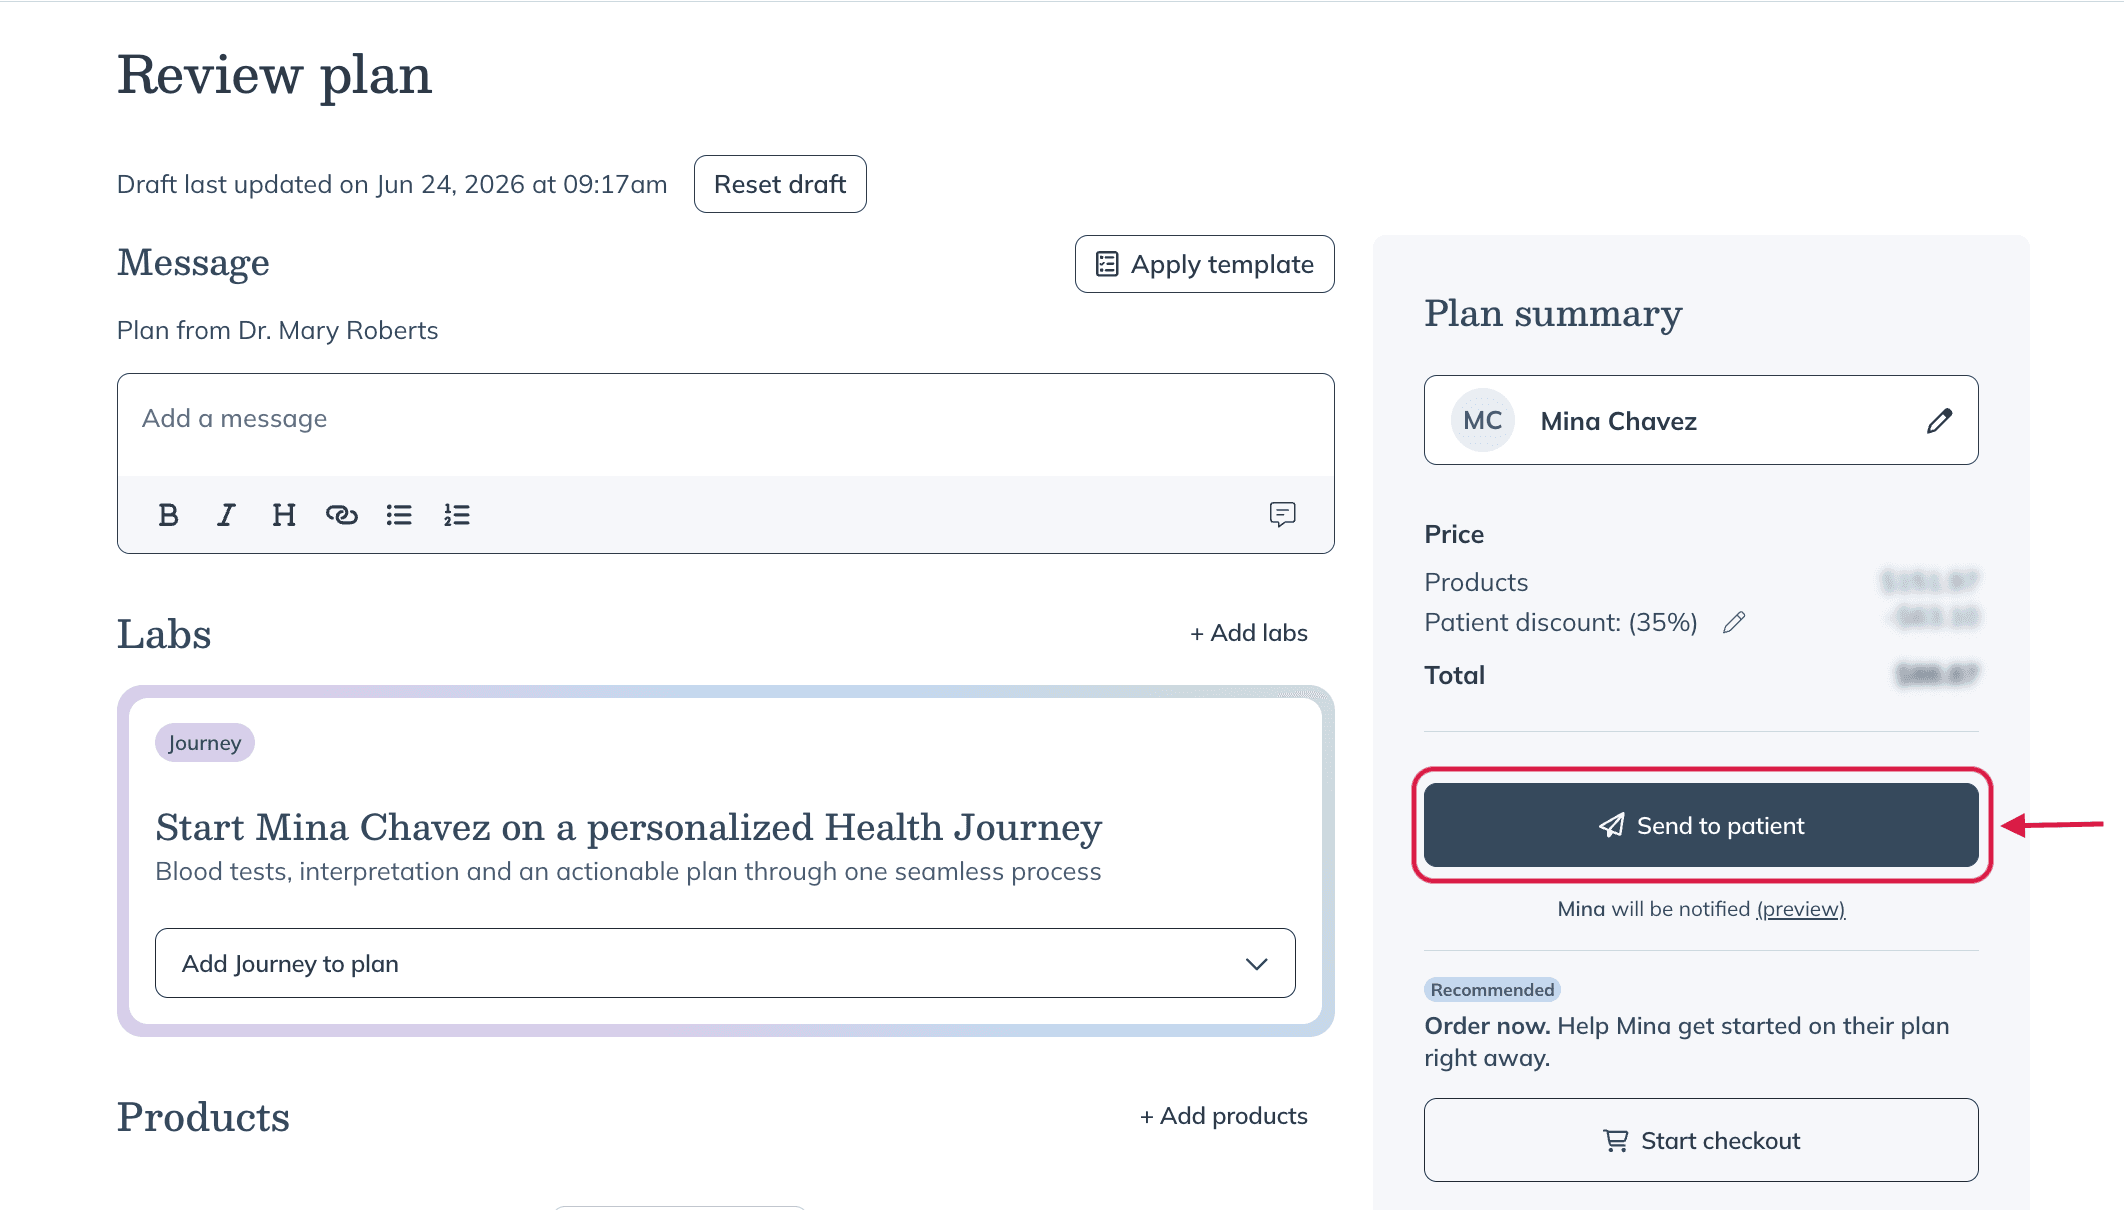
Patients will receive an email and/or SMS message notifying them of the new plan. They can follow the link included to sign up or sign in to their account to view it.
Including labs in plans
If your clinic uses Fullscript Labs, staff can include lab tests in plans alongside supplements once the assigned practitioner has completed lab registration.
For help with staff workflows specific to labs, see Staff: Ordering and managing labs.
Video: Order a lab test for a patient
Resuming draft plans
To resume a draft of a plan:
- Click the Patients tab.
- Search for and select a patient.
You can apply filters on the Patients page to refine your results. To view patients with plan drafts, click the Patient status dropdown and select Draft available.
- Click Plans in the patient profile.
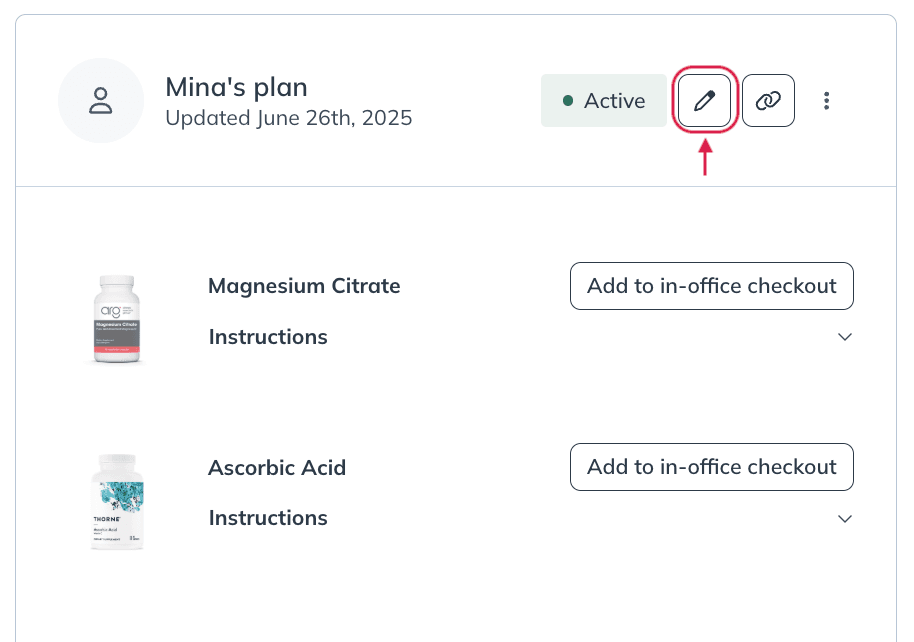
- Find the draft and click Edit ( ) in the plan information box.

- Once you’ve completed the plan, click Send to patient.
Practitioners will receive a notification in their practitioner hub for any incomplete and unsent drafts.
Editing active plans
To make changes to active plans:
- Click the Patients tab.
- Search for and select a patient.
- Find the plan and click Edit ( ) in the plan information box.
- When you’re done updating the plan, click Update plan.
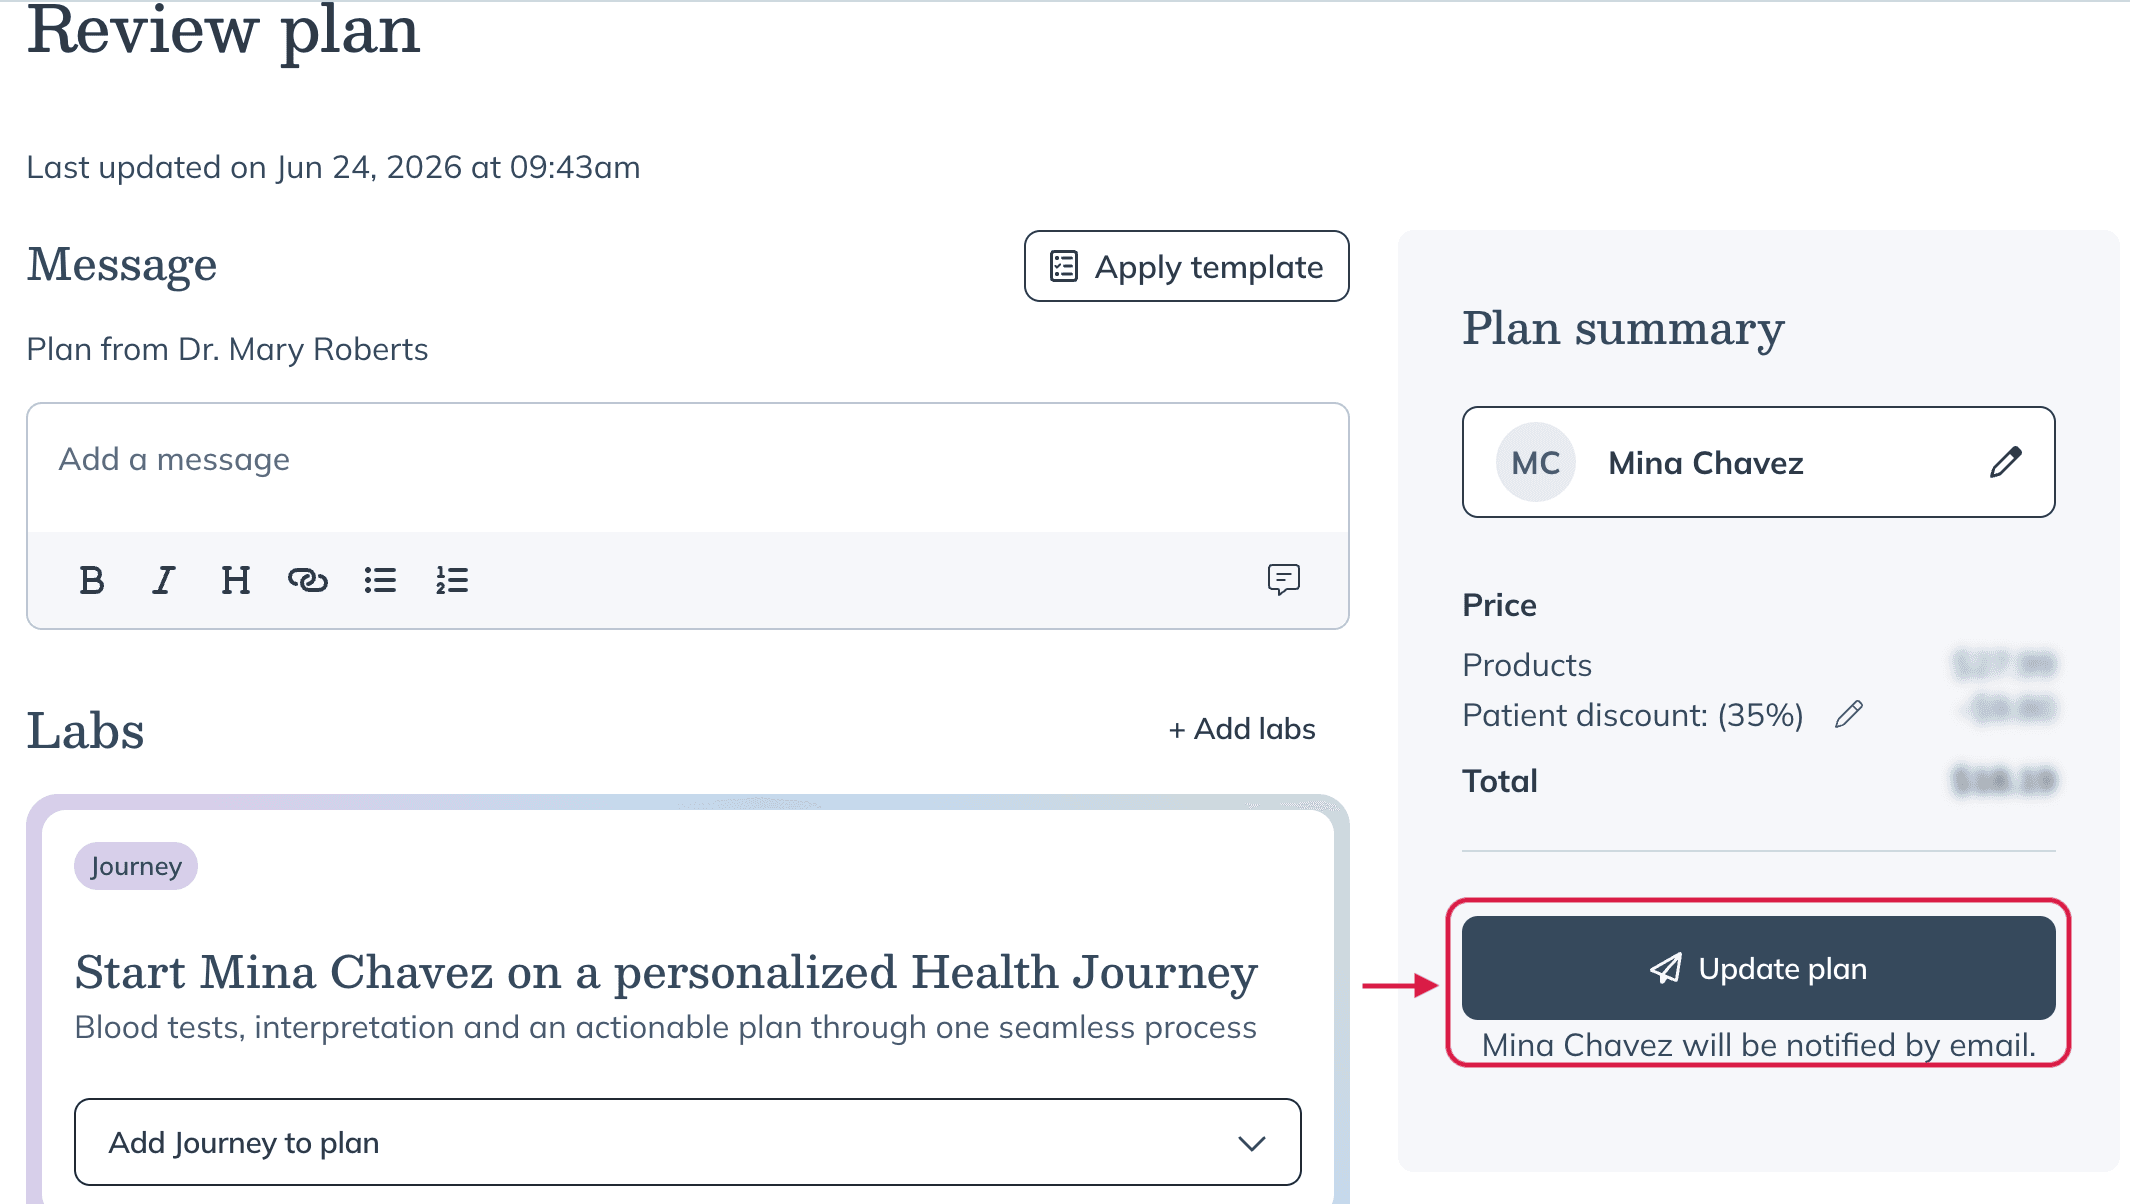
See Editing plans for more details on editing active plans, swapping products, and notifying patients of changes to their plans.
In-office checkout
Need to process a patient’s order in-office? Use the in-office checkout tool to get patients started on their plans right away.
In-office checkout can improve patient adherence by getting orders placed to the patient’s address right away, making it even easier for your patient to get started on their plan! It’s also great to use as a helping hand for your less-than-tech-savvy clientele.
Sending a plan and placing the order
Jump right into in-office checkout from the plan builder tool by clicking Start checkout when completing your changes.
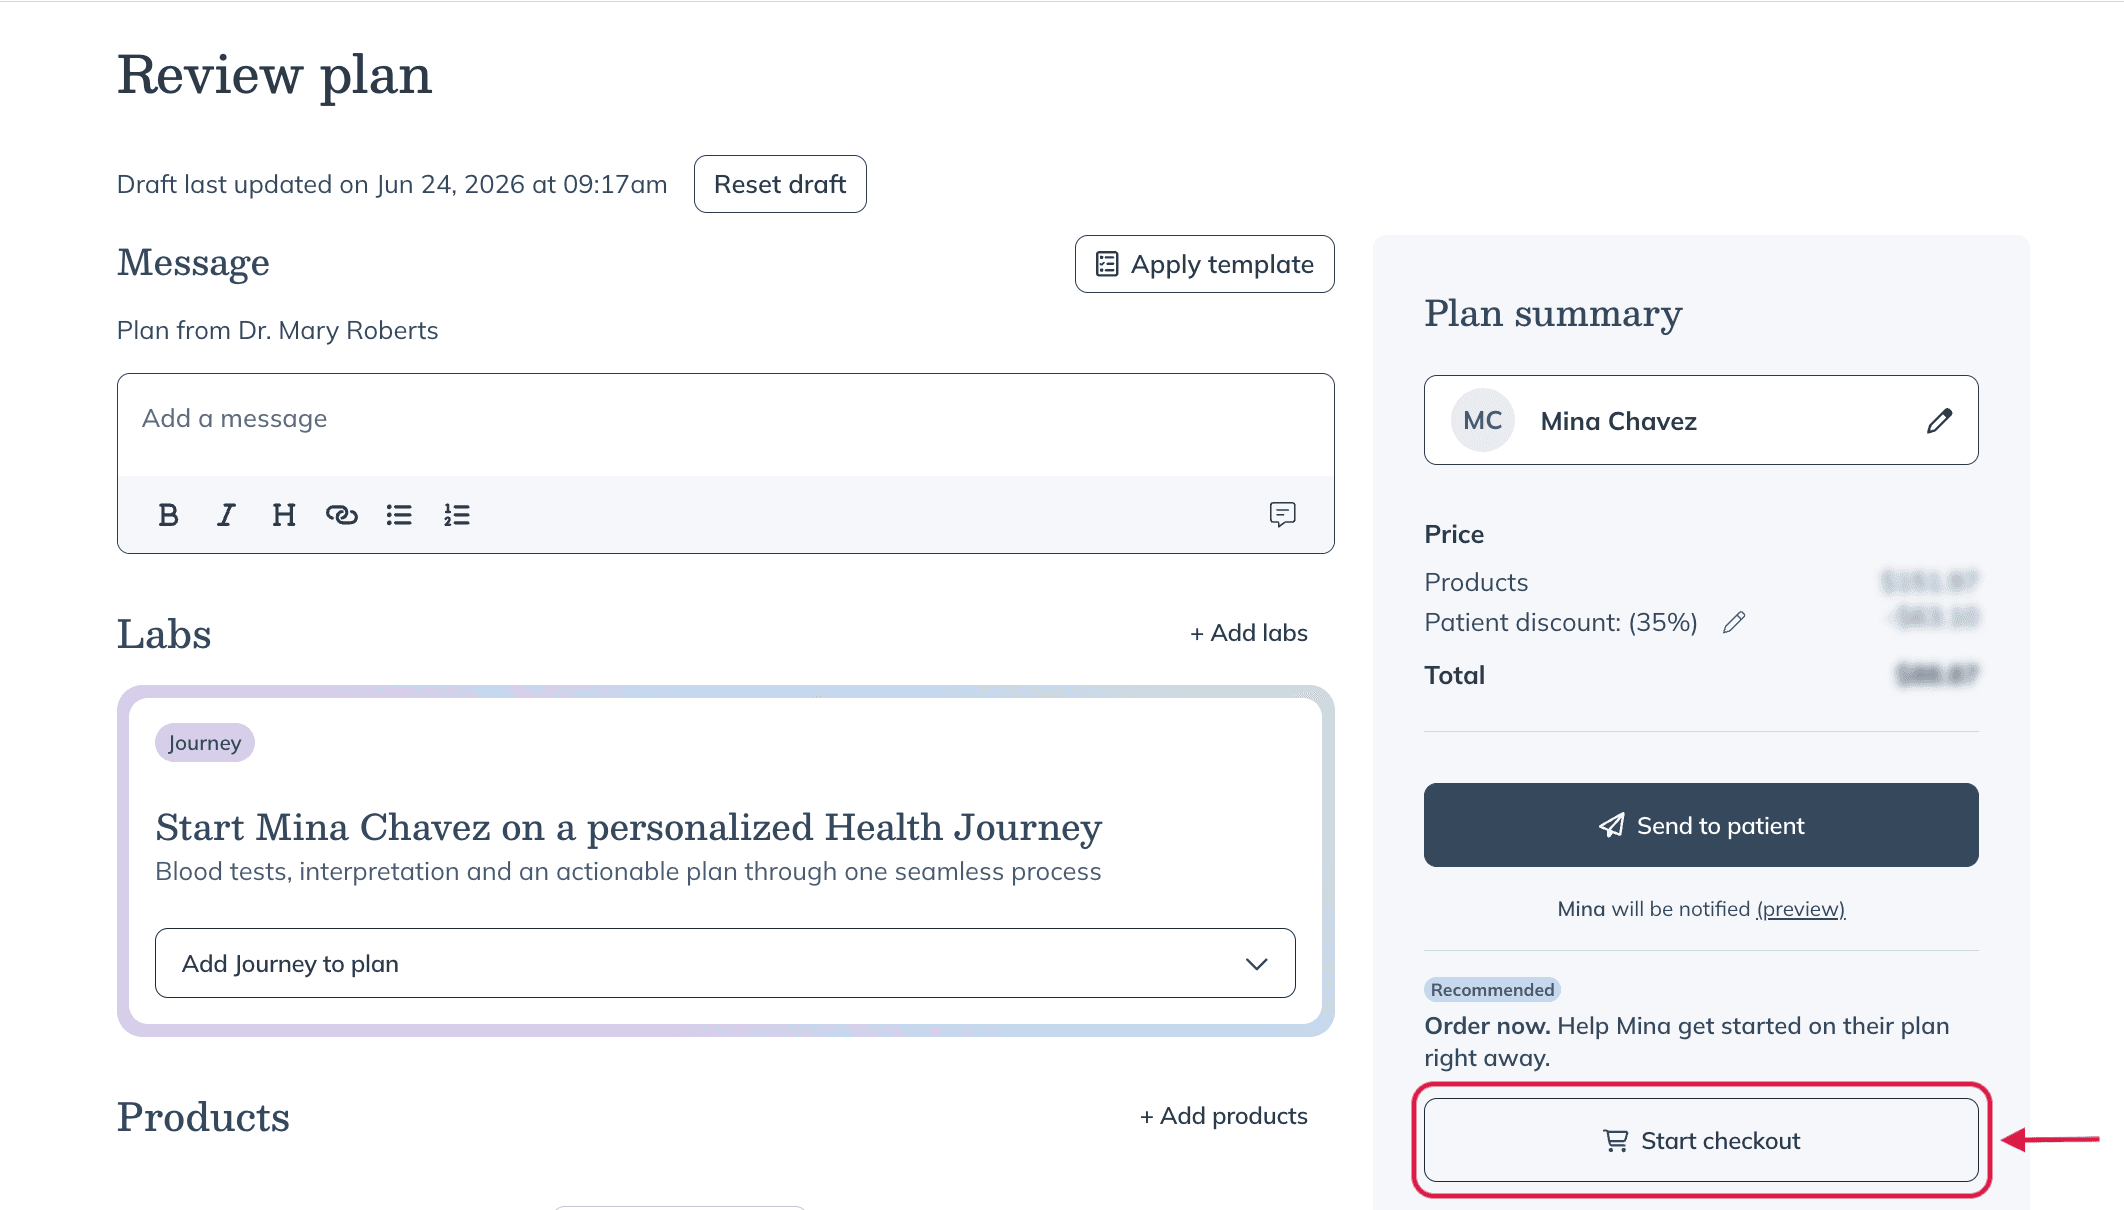
Starting in-office checkout from within the plan building tool.
Adding products to a patient’s basket from their patient profile
You can also start an in-office checkout order by adding products directly from plans in the patient’s profile.
To add products to in-office checkout from a patient’s profile:
- In the patient profile, click Plans.
- Scroll to the item you’d like to add to the cart and click Add to in-office checkout.

- Repeat step 2 for each item, then click out of the drawer.
- Click In-office cart ( ) to begin in-office checkout.
