Last modified: April 2, 2026
Lab interpretations and trends
Providers
Lab results lay the groundwork for personalized care. When you order select Quest Diagnostics blood tests through Fullscript, you unlock interpretation tools that help you turn raw results into meaningful, actionable insights—helping you save time and better support your patients. These tools are backed by advanced intelligence and clinical research to deliver clear, evidence-based analysis you can trust.
Interpretations are available for most popular Quest Diagnostics tests in the Fullscript labs catalog, with no changes to your ordering workflow or patient experience.
With lab interpretation tools on Fullscript, you’ll now be able to:
- Visualize your patient’s results within both optimal and standard reference ranges.
- Track test results over time to observe trends and progress.
- Generate interactive reports that simplify complex results into patient-friendly interpretations with recommended next steps.
This guide shows you how to get the most out of lab interpretations on Fullscript, so your patients stay engaged in their health and connected to your care.
Accessing test interpretations through Fullscript
Once final lab results are available, you’ll receive an email notification with a link to view them directly in your Fullscript account. Results are stored in your Lab orders dashboard, where you and your team can review, interpret, and share them with patients.
You can also access real-time partial results for Quest testing as they become available. The interpretation tool becomes available once all results are final.
To find labs with interpretations:
- Click Labs in the left-hand navigation.
- Click Orders.
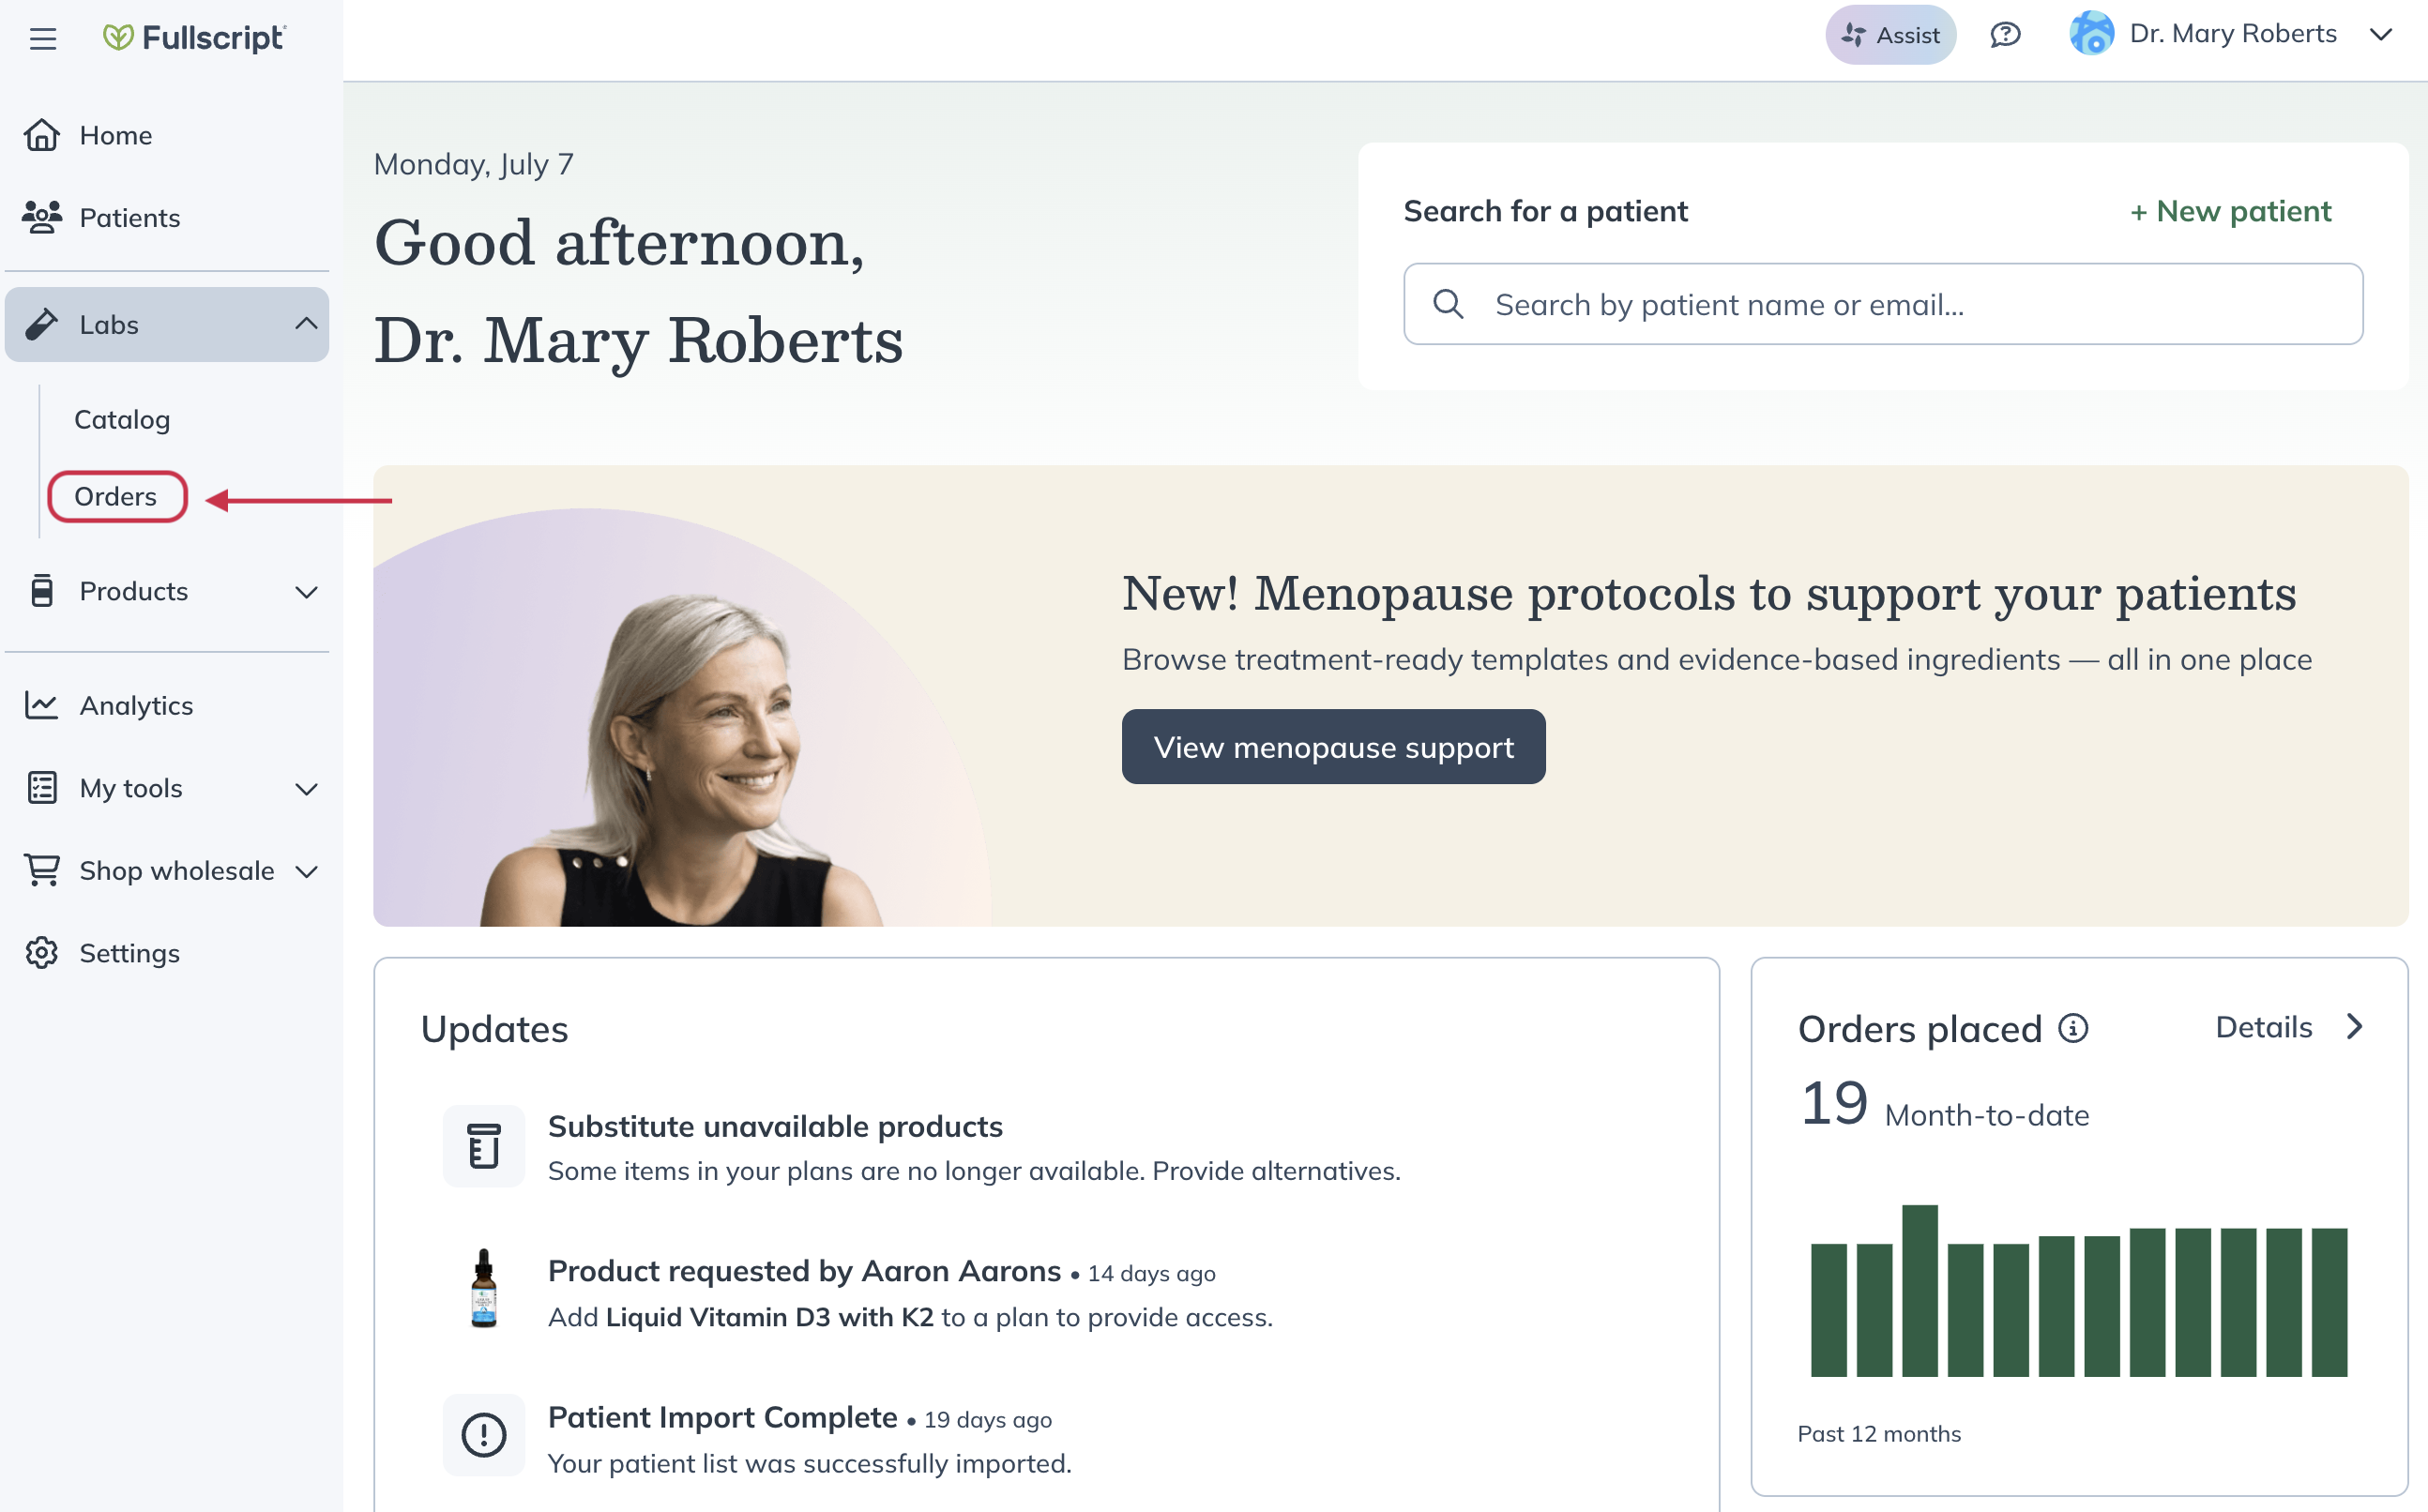
- Search for your patient by name or email, or use the Results available filter above the search bar to see all tests available with partial or full results.
- Click View details for that patient’s test.
- On the Test details page, click View results to view and build your interpretations for the final results.

Interpreting results through Fullscript
When viewing Quest results on Fullscript, you’ll have access to a detailed summary and customizable tools to help interpret and communicate results to your patients.
The Summary section at the top of the interpretation includes:
- Message for patient: Use this area to provide a summary of your patient’s results, and to communicate their next steps.
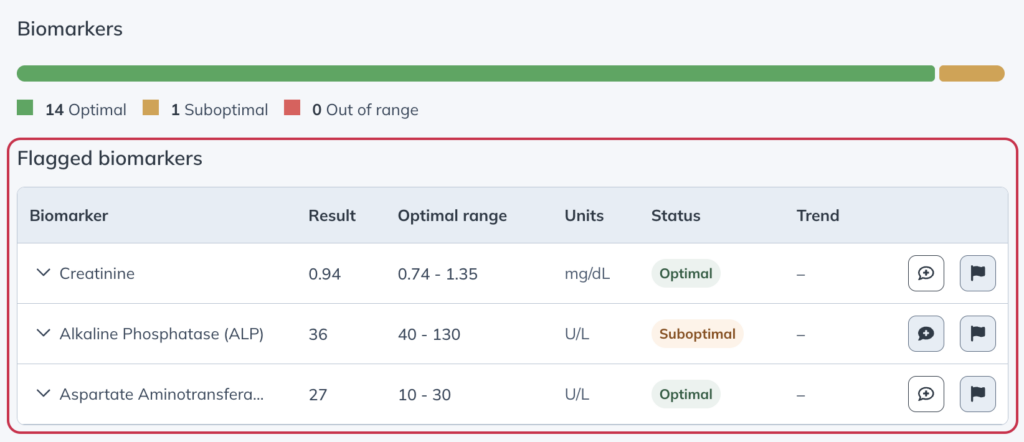
- Biomarkers breakdown: Visualize all your patient’s test values in a simple bar graph categorized into optimal, suboptimal, and out-of-range results, based on both optimal and standard reference ranges.
- Flagged biomarkers: As the practitioner, you can highlight specific areas of concern by flagging biomarkers that need attention.

Our color coding system helps simplify complex results for you and your patients.
- Green: Indicates the test value is within an optimal range.
- Orange: Signifies high or low suboptimal lab values that fall between the standard reference range and an optimal range.
- Red: Represents high or low results based on the lab’s standard reference ranges.
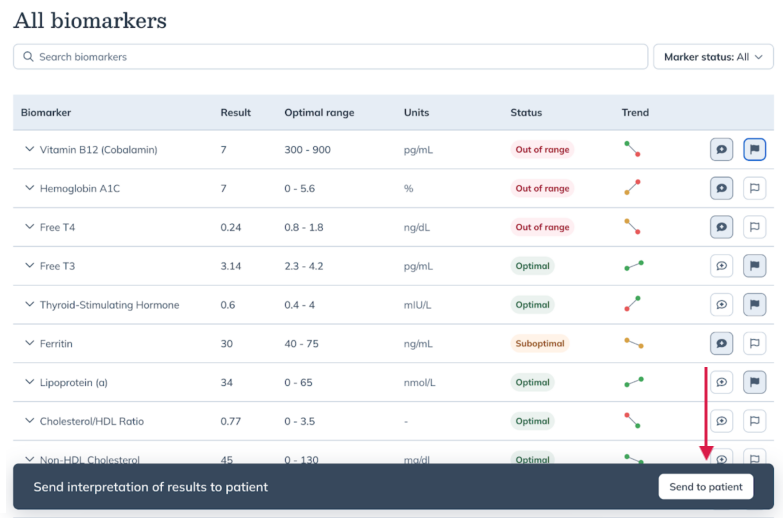
Scroll down to the All biomarkers section to view all the results. Here, you can see all tested biomarkers at a glance, including with your patient’s result, optimal range stats, and units of measurement for that biomarker.
Use the search bar to find specific biomarkers, or filter by Marker status to narrow your search.
Click the arrow ( ) next to each biomarker to view additional details, including a full graph that visualizes how your patient’s results align with both optimal and standard reference ranges.
If your patient has previous results for a biomarker, these will appear in their trends history as a dynamic graph. You can track progress over time with a streamlined visual overview that requires no manual data entry.
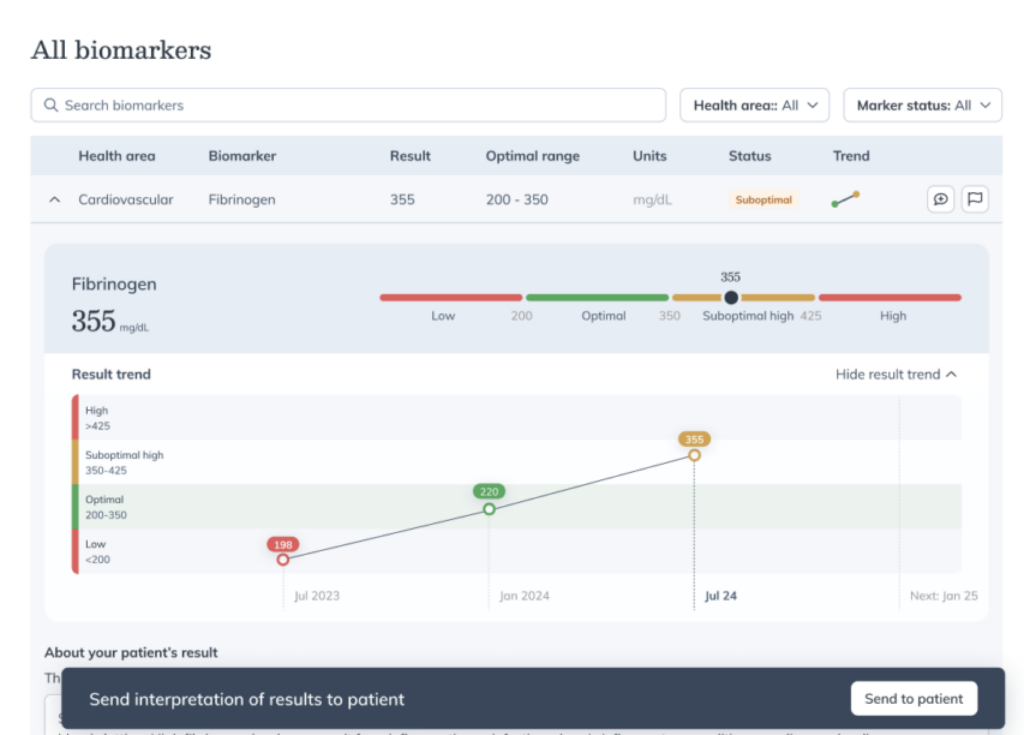
For biomarkers that are out of range, the Note for your patient section will be pre-populated with an interpretation generated by our data and machine learning systems. These systems use the latest in integrative research to offer a clear, digestible summary that helps you communicate your patient’s results.

You have the flexibility to edit or remove pre-populated interpretations entirely as needed, so you can keep interpretations focused and actionable. To highlight key biomarkers you want your patient to be aware of, you can flag biomarkers in their results, which will then appear at the top of their results summary.
Once you’ve finalized the interpretation and are ready to send the results to your patient, click the Send to patient button in the banner at the bottom of your screen.
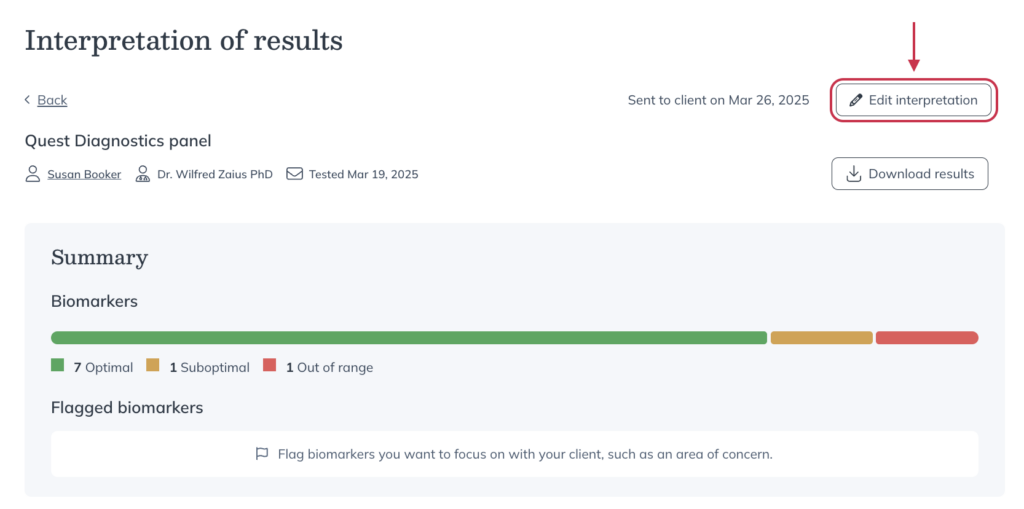
After you send the results to your patient, you can always return to the Test details page by clicking View interpretation. If you need to edit your interpretation, click Edit interpretation from the top right to make any changes. All edits will be reflected in the patient’s view of their results.
Enabling auto-send for lab interpretations
Auto-sending interpretations helps keep patients engaged by notifying them when results are ready. Choose to send results right away or set a delay, giving you time to review and edit before they’re released.
To set up auto-send for your lab interpretations:
- Click Labs in the left-hand navigation.
- Click Labs settings.
- Select Results.
- Turn on the Share results automatically toggle.
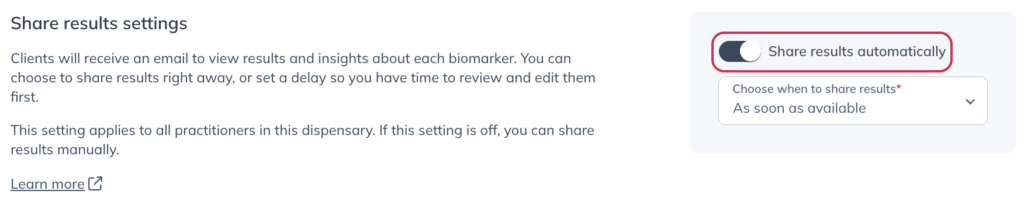
By default, lab results and interpretations will be sent as soon as they’re available. To delay when results are shared with patients, use the Choose when to share results dropdown and select the number of days. Adding a delay gives you or your staff time to review the results and update the interpretations if needed.
Patient results experience with interpretations
Once you send the results interpretation to your patient, they’ll receive an email notification with a link to view their results in their Fullscript account.

When your patient looks at their interpretation, they’ll find:
- Your interpretation summary note.
- A single bar graph highlighting the number of optimal, suboptimal, and out of range biomarkers.
- Any individual biomarkers you flagged in the interpretation.
- The full list of results for the biomarkers tested.
Patients can click into any biomarker in the interpretation to find information on the biomarker itself. Any changes you made to the suggested text will be reflected.
Patients can also access the original blood lab results with the Download button on the right side of their interpretation.
Exporting lab interpretations
Export your lab interpretations and upload them to your EHR. This helps you share reports with patients while preserving biomarker context. Each interpretation PDF includes a QR code patients can use to access to interactive insights about their test results.
To export a lab interpretation:
- Click Labs in the left-hand navigation.
- Click Orders.
- Search for the patient whose results you’d like to export and click their order.
- On the Test details page, click View results.
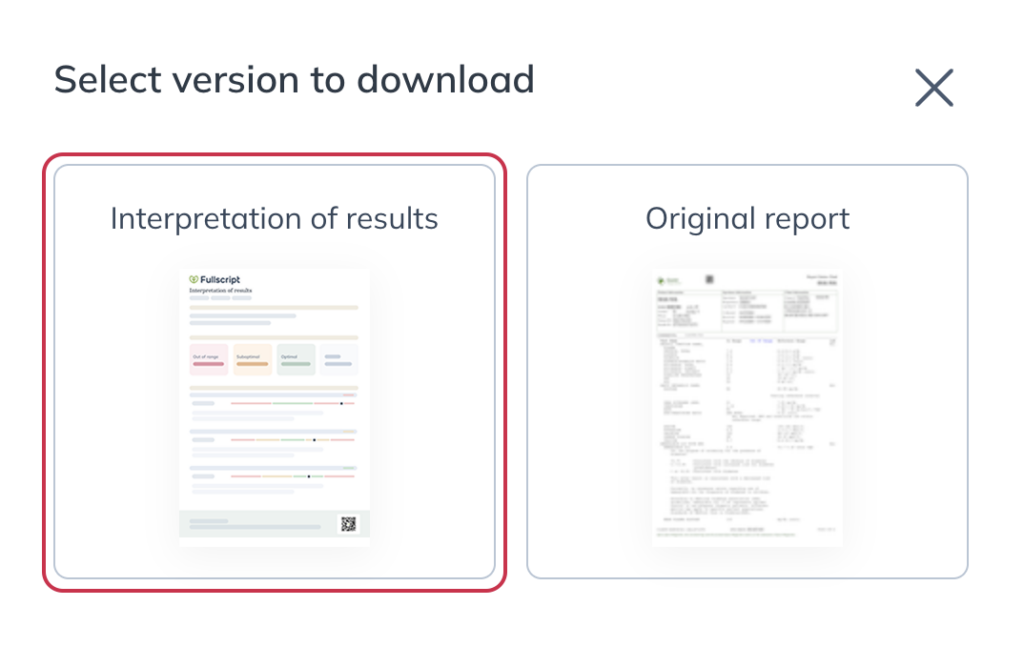
- Click Download results.
- Select Interpretation of results. The PDF file will be saved to your downloads folder.
Expanding lab interpretations on Fullscript
Lab interpretations are a new feature, and we’re committed to expanding it over time. Practitioner feedback is crucial in helping us improve the experience. If you’d like to share any feedback or suggestions with us, contact our support team.