In-office specialty kits are specialty lab kits that providers can order, stock, and activate directly through Fullscript. Providers can order a limited number of kits at no upfront cost (excluding shipping), activate them in a few steps, and either collect samples in-office or provide the kit to the patient with instructions.
Purchasing in-office kits
In-office kits are free to order through the wholesale catalog. Wholesale orders with five or more lab kits qualify for free shipping.
To order in-office kits for use in your office:
- In the Shop wholesale tab, click Lab supplies.
- Click Specialty kits in the top navigation bar.
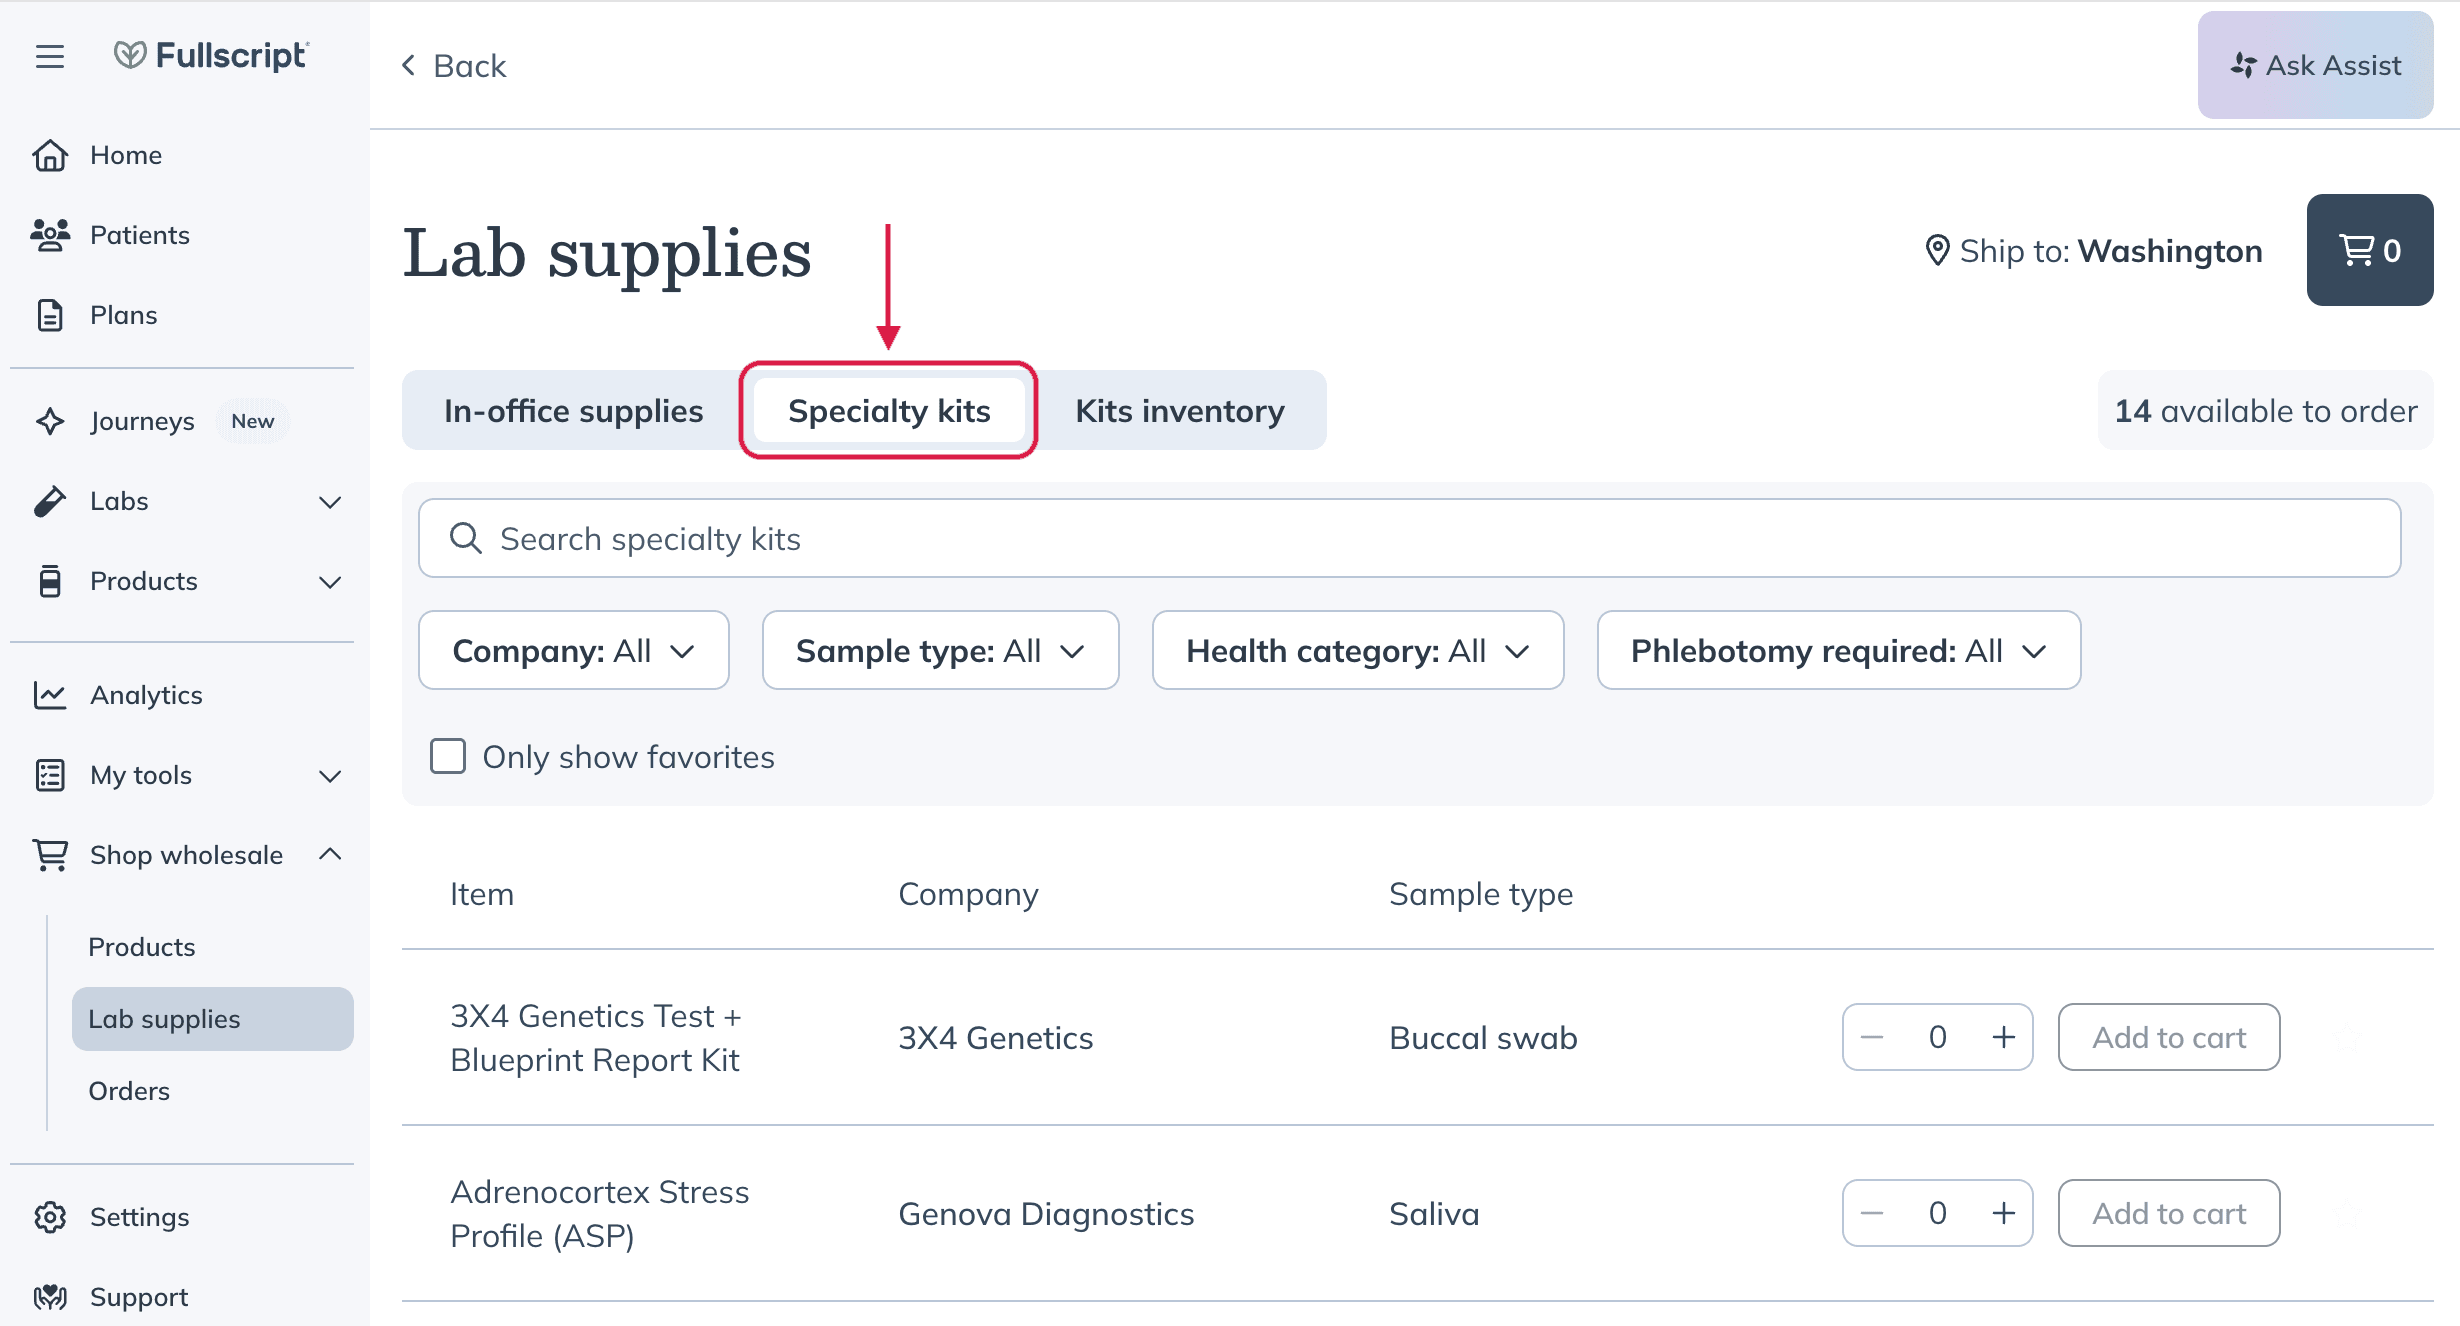
- Search for a kit, test, or lab company in the same way you would navigate the Wholesale catalog.
- Use the +/- buttons to adjust quantities, then click Add to cart. Repeat this with each test you’d like to stock in-office.
You’re able to stock a maximum of 20 in-office kits at a time, regardless of test type.
- Add any additional products you’d like to order, then select the cart icon to Go to checkout and complete your purchase.
Activating an in-office kit
Activate in-office specialty kits before giving them to your patient or collecting samples in your clinic. Activation links the kit to the patient and creates the lab order. Patients can’t activate these kits themselves.
Correct order: Activate the kit → complete checkout → give the kit to your patient
If a kit is given to a patient before it’s activated:
- The test may not be linked to the patient
- Processing can be delayed
- Manual follow-up may be needed to correct the order
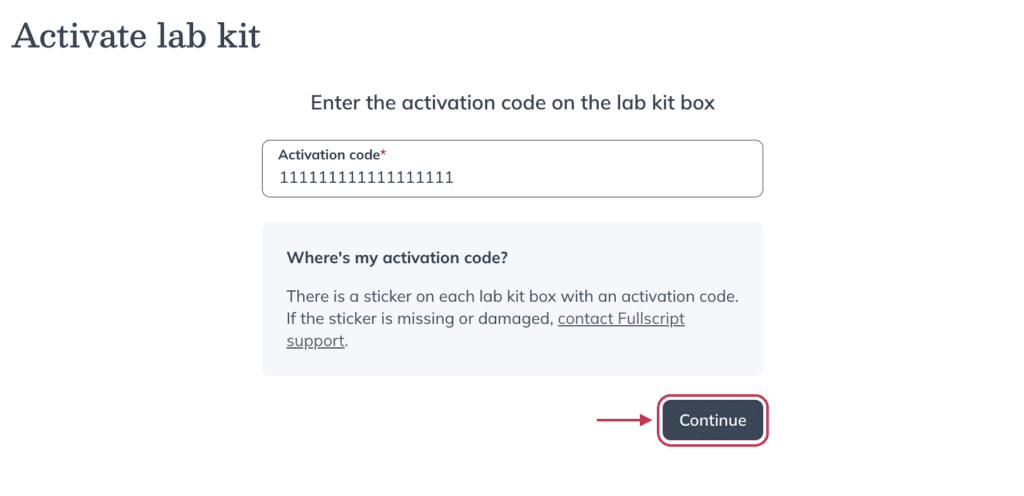
Each kit includes an activation code directly on the kit packaging, along with a URL that links to the activation page. Use this code to activate the kit in Fullscript.
To activate an in-office specialty kit
- Enter the activation code on the activation page, then click Continue.
- Choose the associated test and any add-ons.
- Click Add to plan.
- Add any additional products, labs, or resources to the plan as needed.
- When you’re ready, click Continue to checkout to send the plan to your patient.
- Give the activated kit to your patient.
You can choose to bill the patient directly using in-office checkout or pay as a provider.
Video: How to activate an in-office lab kit
Accessing your patient’s requisition (if required)
After placing the order, download and print the requisition form if one is required for sample collection.
Some labs don’t require printed requisition forms. For Mosaic, Genova, and 3X4 Genetics, the kit activation process replaces the requisition, so you don’t need to print or include additional paperwork with the kit.
To locate the requisition form:
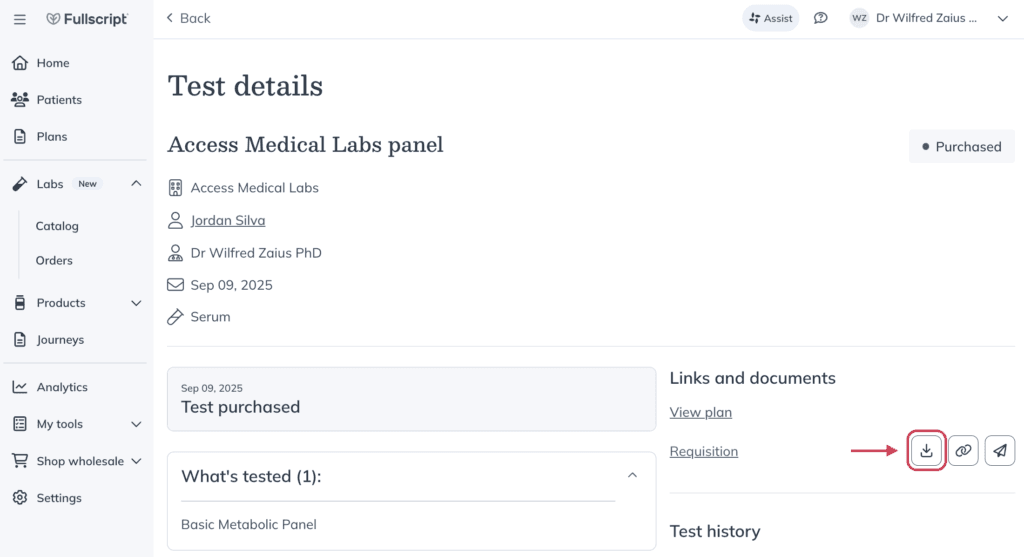
- In the Lab > Orders tab, select the relevant order to view details.
- If the lab requires a printed requisition, click the Download button ( ) to download and print the form.
Each kit includes detailed instructions and prepaid shipping materials.
Next steps
In-office specialty kits are fully integrated with Labs on Fullscript. Once a kit is completed and submitted, providers can view results and create personalized plans with ease.
In-office kits aren’t compatible with blood draw services like GetLabs or preferred phlebotomists. If you’re equipped to perform blood draws in your clinic, you can collect samples on-site. Otherwise, patients will need to arrange a local phlebotomy option.