Last modified: October 22, 2024
Adding and removing products from auto refill
Patients
Making changes to scheduled auto refills
You can edit the products on auto refill at any time. However, changes won’t affect confirmed orders. Once an order is placed, we can’t add or remove products as we prioritize filling orders as quickly as possible.
Adding new products to auto refill
You can add any product to auto refill! Just look for the Schedule auto refills option on products in your plans, catalog, order history, or Auto refills page to get started.
Scheduling auto refill from the shopping cart
As products are added to your shopping cart, an auto refill menu will be displayed under each product. To add a product to an auto refill order, select the Schedule auto refills menu and choose a shipping frequency. The auto refill order will be activated when the order is placed.

Scheduling auto refills from your plan or the catalog
You can add new products to auto refill from your plans or the catalog:
- Tap the product.
- Under purchase options, tap Auto refills.
- Adjust the number of units and shipping frequency.
- Tap Add to cart to create a new scheduled auto refill schedule while placing a new order, or tap Schedule for later to create an auto refill schedule without checking out.
You’ll need to set your shipping and billing information to successfully set up new auto refills. Head to the Orders page to manage existing auto refill schedules.
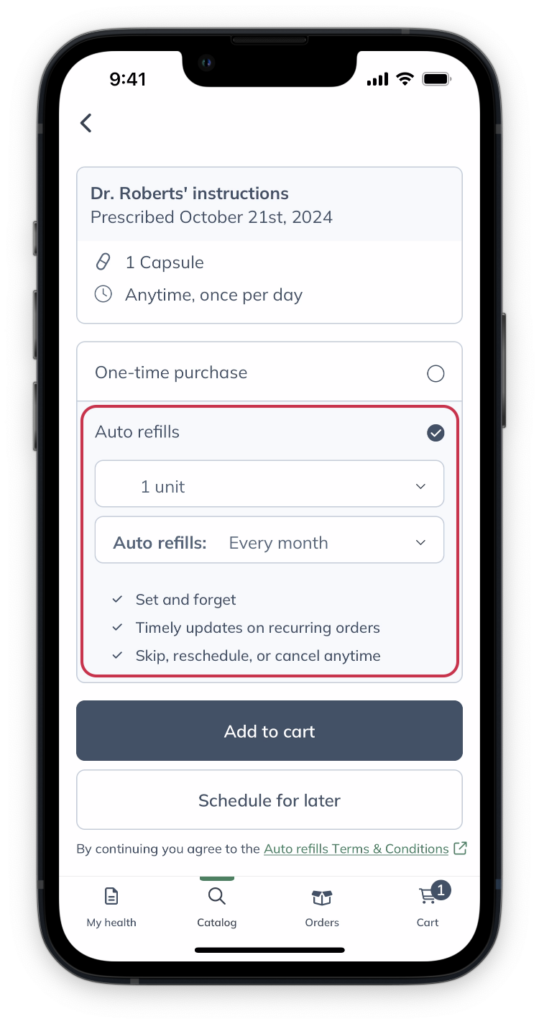
Setting up auto refills from a product card.
Previously ordered products
To schedule a past order on auto refill, go to the Orders page and tap the Refill.
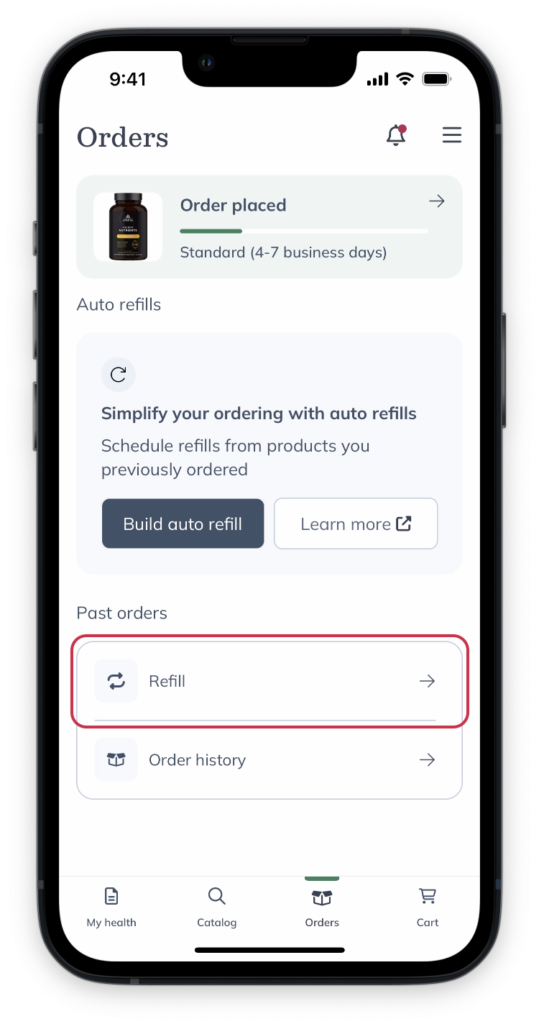
Tap Refill on the Orders page.
To auto refill individual products:
- Tap Order history on the Orders page.

- Tap the order that contains the item.
- Tap the product on the order page.

- Tap Auto refills.

- Set up the number of units and the the shipping frequency.
- Tap Schedule for later. If you’d like to place an order now, tap Add to cart.

Scheduling auto refills from the shopping cart
As you add products to your cart, you’ll see a Schedule auto refill menu under each item. To set up auto refills, select the dropdown and choose a frequency. Your auto refill will be activated when the order is placed.
Selecting a frequency from the Autoship every menu.
Scheduling auto refills from your plan or the catalog
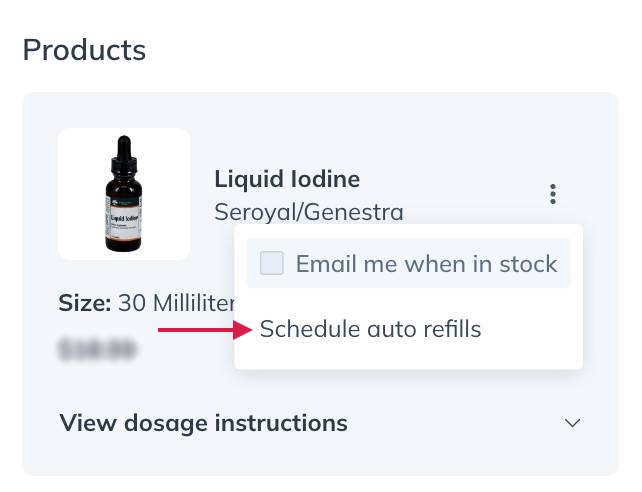
You can add new products to auto refill from your plans or the catalog by hovering your cursor over the product card, clicking on the options menu ( ), and selecting Schedule auto refills. You’ll need to set your shipping and billing information to set up new auto refill schedules successfully. Head to the Auto refills page to manage existing auto refill schedules.
Setting up auto refills from the catalog.
Previously ordered products
Previously ordered products can be added to auto refills from your Order history and Auto refills pages.
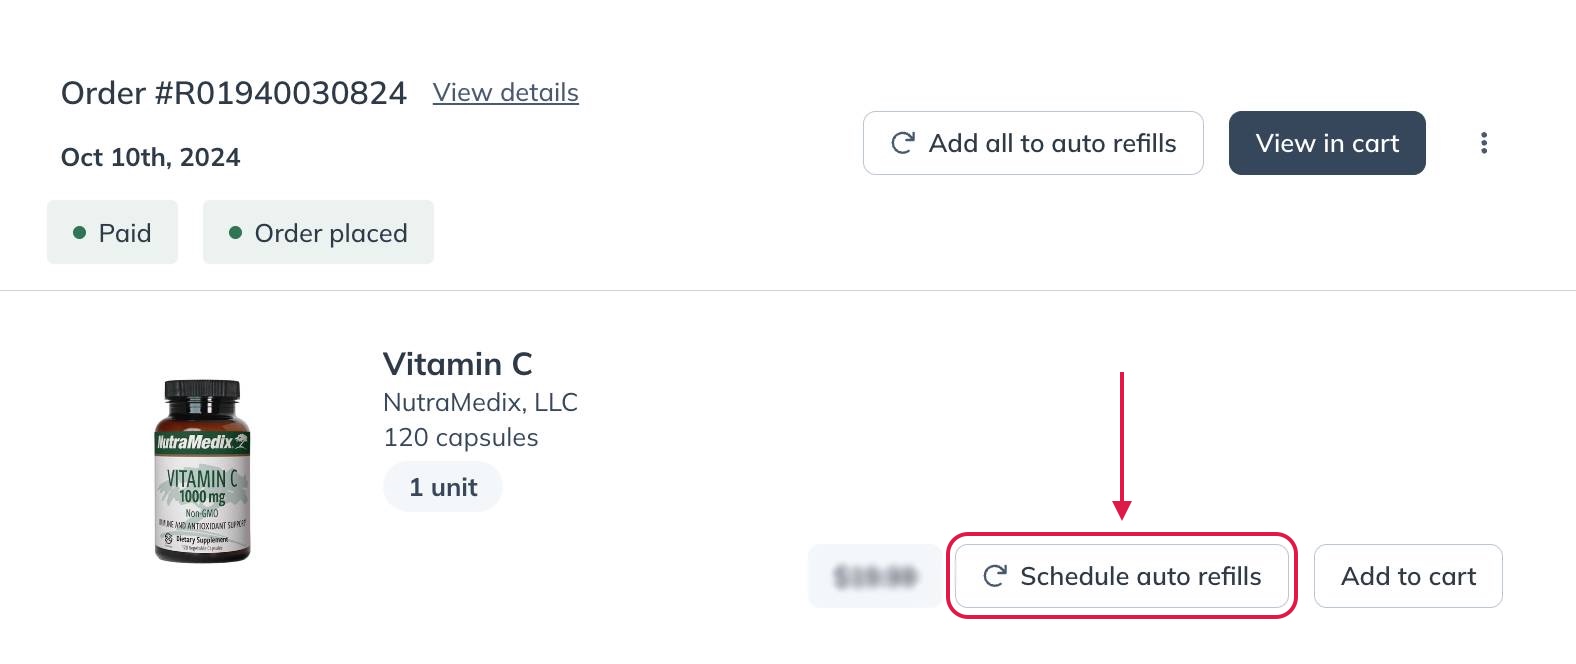
To schedule a past order to auto refill, go to the Order history page and select the Add all to auto refills button from any past order. To auto refill individual products, select the Schedule auto refills button next to any product.
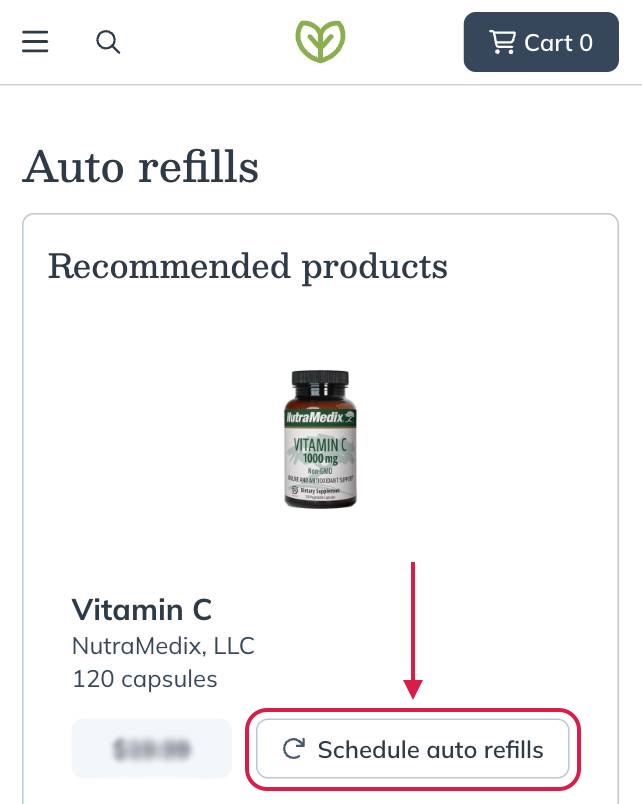
To schedule previously ordered products from the Auto refills page, find a product under the Recommended products heading and select Schedule auto refills.
Scheduling an auto refill for a product from the Auto refills page.
Scheduling an auto refill from the product display page
When viewing the product display page for a specific item, you can easily set up an auto refill. To set up an auto refill from the product display page:
- Click the Auto refills checkbox.
- Select the frequency using the dropdown menu.
- Click Schedule auto refills.
- In the pop-up that appears, review and adjust the details of the auto refill and click Schedule.
Scheduling an auto refill from the product display page.
Scheduling auto refill from the shopping cart
As products are added to your shopping cart, a Schedule auto refill menu will be displayed under each product. To add a product to auto refills, tap the menu and choose a frequency. The auto refill will be activated when the order is placed.
Selecting a frequency from the Schedule auto refill menu.
Scheduling auto refills from your plan or the catalog
You can add new products to auto refill from your plans or the catalog by tapping on the options menu ( ), and tapping Schedule auto refill. You’ll need to set your shipping and billing information to set up new auto refill schedules successfully. Head to the Auto refills page to manage existing auto refill schedules.
Setting up auto refill from a plan.
Previously ordered products
Previously ordered products can be added to auto refill from your Order history and Auto refills pages.
To schedule a past order to auto refill, go to the Order history screen and tap the Add all to auto refills button from any past order. To auto refill individual products, tap the Schedule auto refills button next to any product.
To schedule previously ordered products to auto refill from the Auto refills page, find a product under the Recommended products heading and tap Schedule auto refills.
Setting a product to auto refill from the Auto refills page.
Scheduling auto refills from the product display page
When viewing the product display page for a specific item, you can easily set up auto refill. To activate auto refills from the product display page:
- Click the Auto refills checkbox.

- Using the dropdown menu, select the frequency you’d like your auto refill to be processed at.
- Click Schedule auto refills.

- On the splash page that appears, review and adjust the details of the auto refill and click Schedule.
Removing products from auto refill
To remove a product from auto refill:
- Go to your Orders ( ) page.
- Tap on an auto refill schedule that contains the product you want to remove.

- Tap on the product
- Tap Remove from auto refills.

Adjusting product quantities
To adjust the number of units (i.e., bottles, packs, bags, boxes, etc.) of a product to include in your auto refill orders:
- Go to your auto refill ( ) screen.
- Tap on a scheduled auto refill with the product you want to adjust.
- Tap the product.
- Under Auto refill details, tap the supply drop-down menu and increase or decrease the quantity.

To remove a product from auto refills, go to the Auto refills page, click the options menu ( ) on the product card, and select Remove. Select a reason and add additional comments to help us improve the auto refill service, then click Cancel auto refills to confirm.
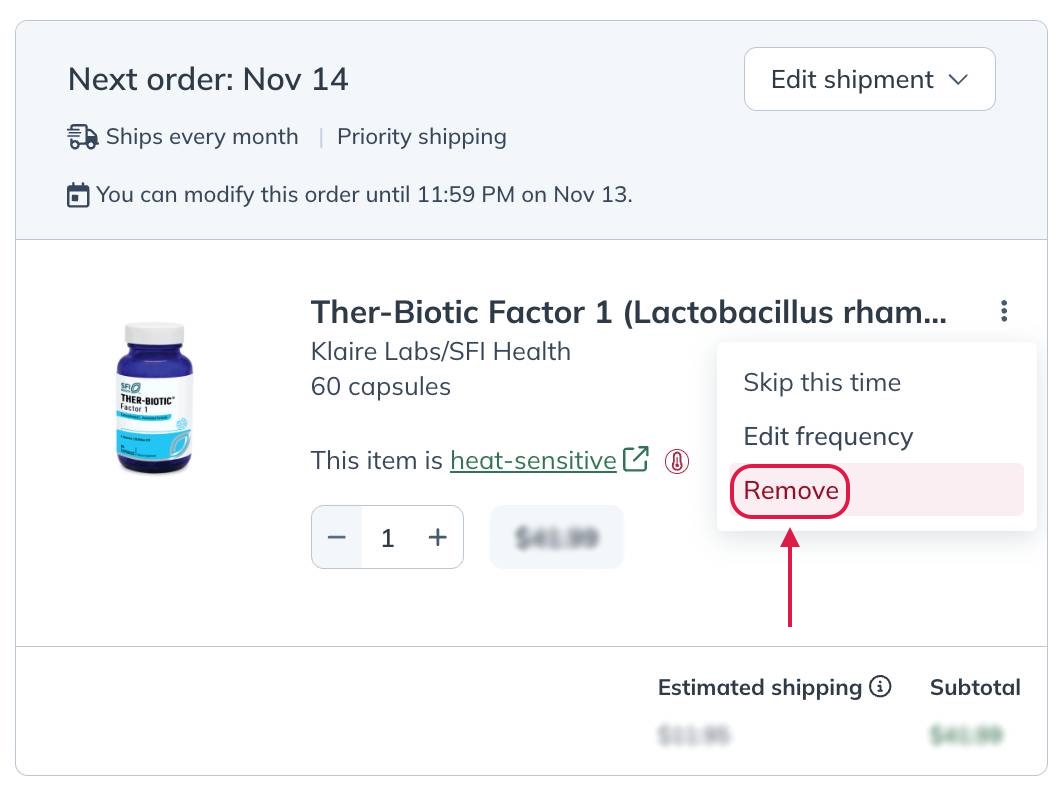
Removing a product from auto refills.
Adjusting product quantities
To adjust the number of units (i.e., bottles, packs, bags, boxes, etc.) of a product to include in your auto refills, go to the Auto refills page and use the plus ( + ) or minus ( – ) selectors next to any product to increase or decrease quantities to ship.
To remove a product from auto refills, go to the Auto refills screen, tap the options menu ( ) on any product card, and tap Remove. Select a reason and add additional comments to help us improve the auto refill service, then tap Cancel auto refills to confirm.
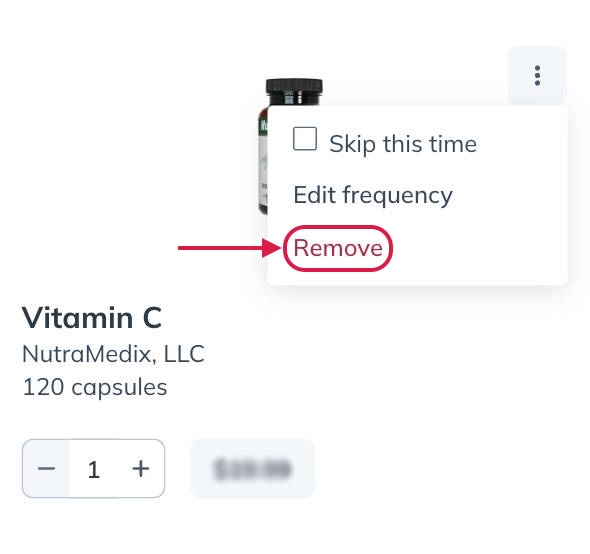
Removing a product from auto refills.
Adjusting product quantities
To adjust the number of units (i.e., bottles, packs, bags, boxes, etc.) of a product to include in your auto refill, go to the Auto refills screen and use the plus ( + ) or minus ( – ) selectors next to any product to increase or decrease quantities to ship.
Canceling scheduled auto refills
To cancel your auto refill orders from the Orders ( ) page, tap on a scheduled auto refill, tap Delete auto refill, and then tap Delete to confirm.
![]()
Though optional, we encourage you to select a cancellation reason and any additional information (optional). Please see Canceling your auto refill order for more information.
To cancel your auto refills from the Auto refills page, select the Edit shipment menu, then Cancel auto refills.
Though optional, we encourage you to select a cancellation reason and any additional information (optional). When finished, select Cancel auto refills to confirm the cancellation. Please see Canceling your auto refills for more information.
To cancel your auto refills from the Auto refills screen, tap the order’s options menu ( ), then Cancel auto refills.
Though optional, we encourage you to select a cancellation reason and any additional information (optional). When finished, tap Cancel auto refills to confirm the cancellation. Please see Canceling your auto refills for more information.