Last modified: March 20, 2026
Getting started with Fullscript Journeys
Providers
Fullscript Journeys is a provider-led way to deliver an end-to-end patient experience for diagnostic and preventative care. It allows you to create and share lab-based journeys that patients can order directly, while keeping you in control of interpretation, recommendations, and next steps.
After intake and lab testing, you receive AI-assisted lab interpretations and a wellness plan with suggested next steps. You can review, adjust, and send everything to the patient—keeping your guidance at the center of care.
Setting up Fullscript Journeys
Setting up Fullscript Journeys creates your public journeys page and link, where patients can view and order the journeys you choose to offer.
To set up your journeys page:
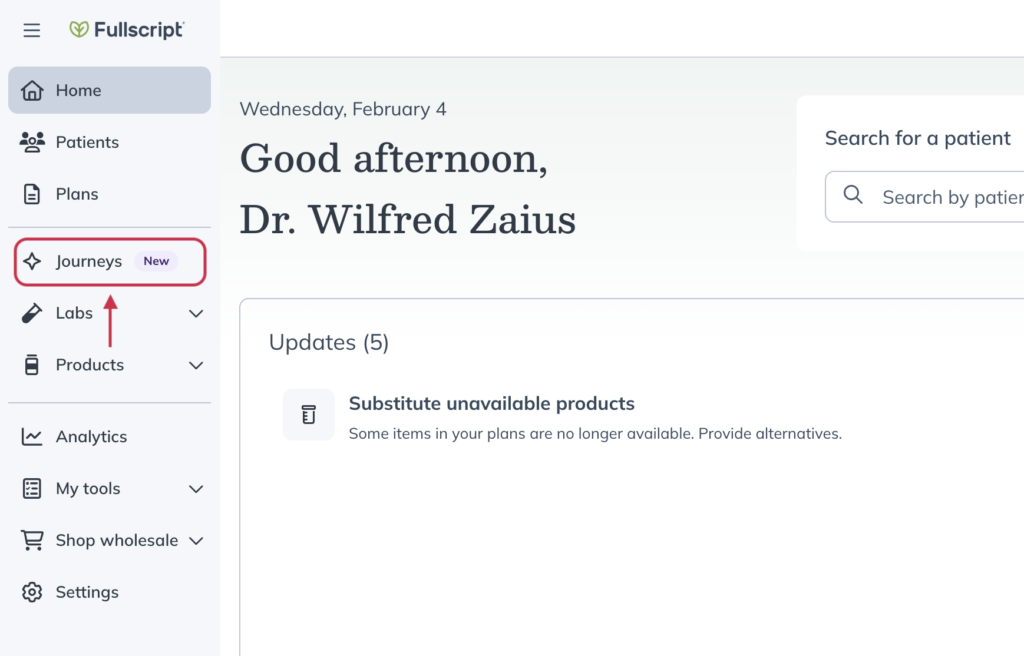
- From the home page, click the Journeys tab in the left-hand navigation. If this is your first time accessing journeys, you’ll be prompted to complete the setup workflow.
- Choose one or more Journey templates for your page, or customize a template to create your own.
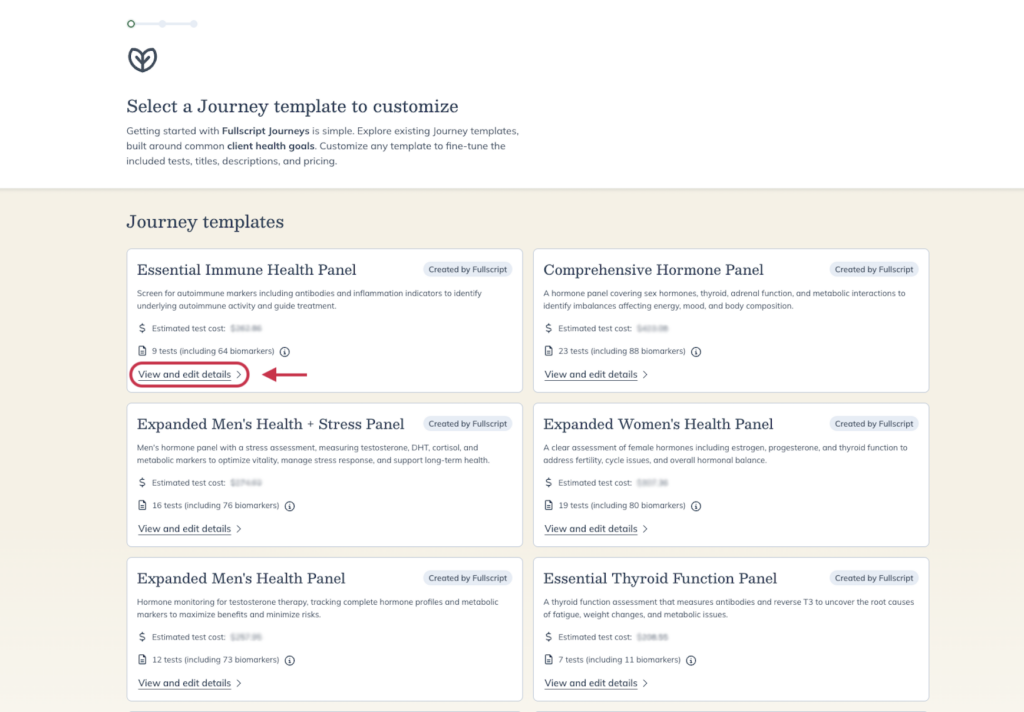
- Open a template to review or update the title, description, included tests, and pricing.
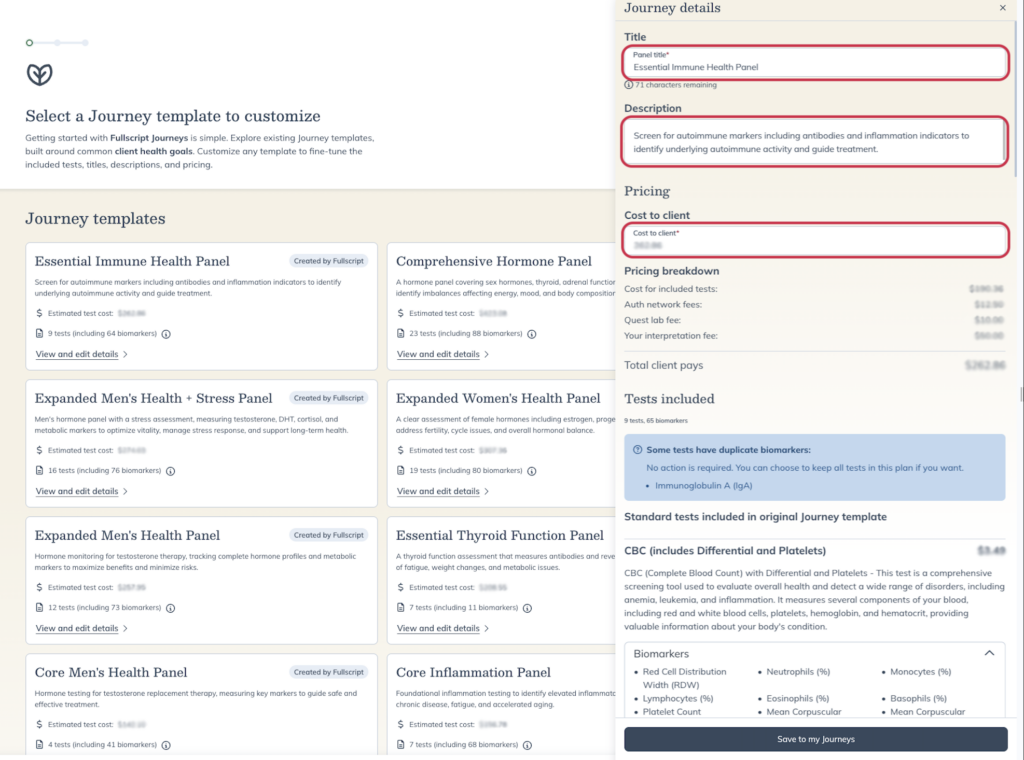
- Click Save to my Journeys.
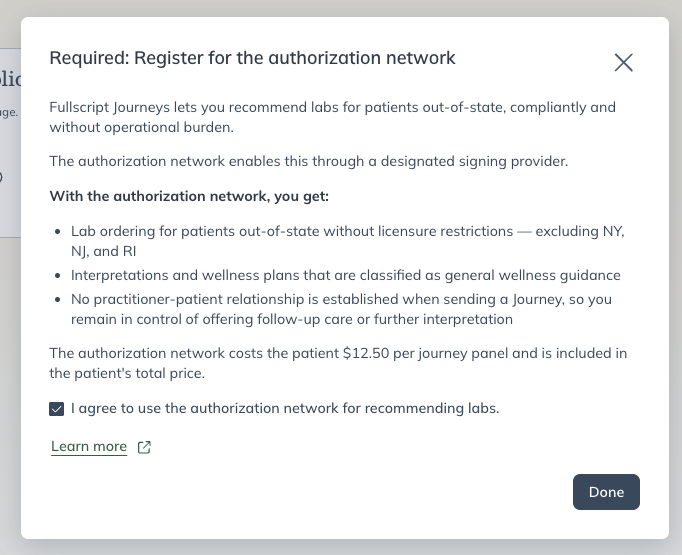
- Review the authorization network terms and click Done to continue. This step is required for journeys — see authorization network details below for more information.
- Confirm the provider name patients will see, review the journeys you’ve added, then click Continue.
- You’re all set! From here, you can select Invite a patient to start a Journey or View my Journeys website.
Sending a journey as a sub-practitioner
Sub-practitioners can send journeys using the panels created on the main practitioner account.
To send a journey:
- Navigate to the patient’s profile.
- Click Build plan, then select Start with a Journey.
- Choose a Journey panel from the list available.
- Review the details, then send the journey to the patient.
Why journeys requires the authorization network
Fullscript Journeys requires providers to opt in to the authorization network because it allows you to recommend lab testing for patients in states outside your licensure (excluding NY, NJ, and RI). The authorization network enables compliant lab ordering through a designated signing provider, allowing patients to complete lab testing without licensure restrictions while you remain responsible for reviewing results and offering follow-up care.
There is a $12.50 fee per journey panel, paid by the patient. This fee is included in the total price shown at checkout. Patients see the total cost of the journey panel and do not see a separate breakdown of authorization network or interpretation fees.
Providers must agree to use the authorization network in order to complete journeys setup.
Navigating the journeys tab
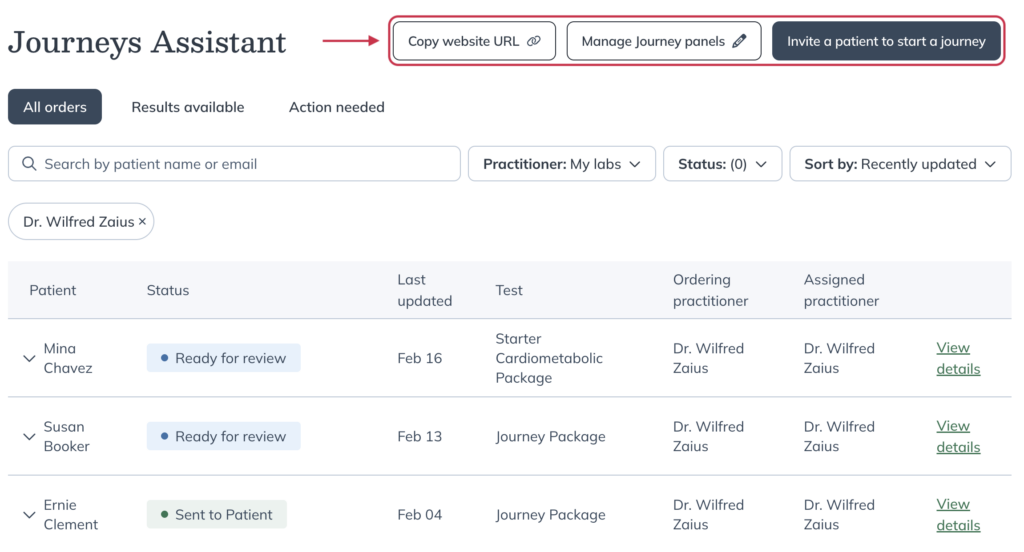
The Journeys tab opens the Journeys Assistant dashboard, where you can manage your available journey panels and track patient orders. Only orders placed through Journeys appear here—journey orders do not appear in the Labs tab.
Managing journey panels and inviting patients
At the top of the dashboard are tools for managing your journeys and sharing them with patients.
- Copy website URL — Copies the link to your public journeys page, where patients can view and order the journeys you offer. You can share this link on your website, in patient communications, or on social media so patients can easily access your journeys page.
- Manage Journey panels — Opens the journey panels page where you can review and edit the panels offered on your journeys page, including titles, descriptions, pricing, and included tests.
- Invite a patient to start a journey — Sends a journey directly to a patient. After selecting a patient, the journey follows the same workflow used when starting a plan with supplements or labs. You can also start a journey from a patient profile by selecting Build plan and choosing Start with a Journey.
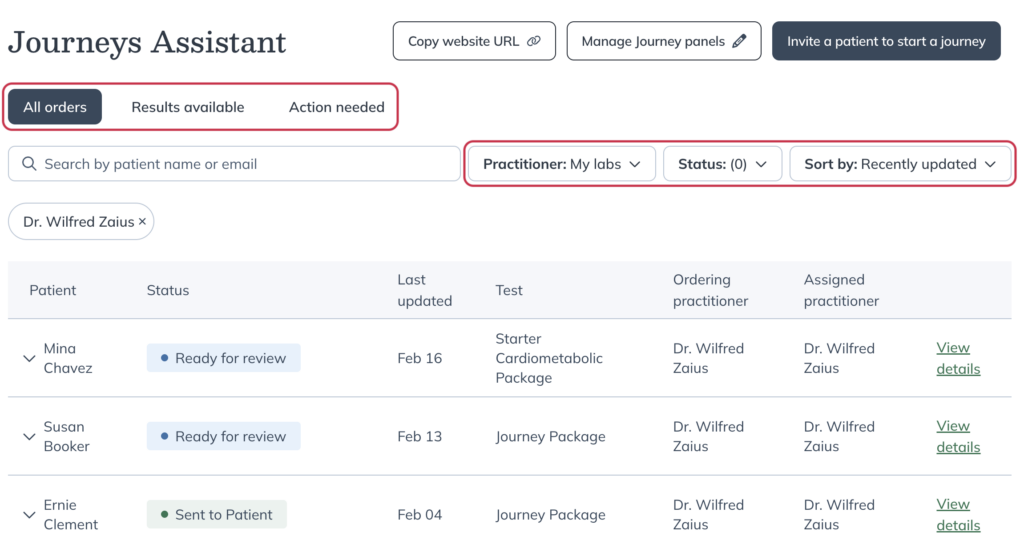
Viewing and filtering journey orders
The dashboard shows a list of patient journey orders placed through your journeys page.
Use the controls at the top of the table to find specific orders. You can filter orders by All orders, Results available, or Action needed, search by patient name or email, filter results by practitioner or status, and sort the list by recently updated or other available options.
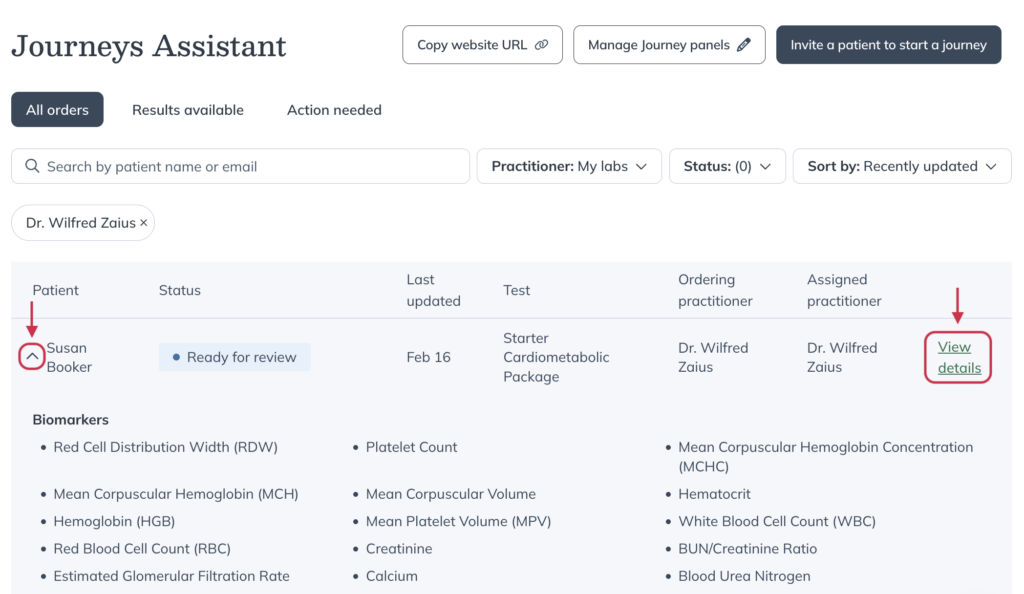
To view more information about a journey order, click the arrow beside a patient row to expand it. From the expanded view, select View details to open the order page where you can review results and take action before anything is shared with the patient.
When an order shows a status of Generating interpretation, lab results have been returned and Fullscript is preparing the interpretation and wellness plan. No action is required during this stage—you’ll be notified when it’s ready for review.