Last modified: March 16, 2026
Custom panels
Providers
Custom panels let you group frequently ordered biomarkers from the same lab company into reusable, personalized test panels that match your care model — whether you focus on condition-specific testing, functional markers, or routine checkups.
Once created, custom panels appear at the top of your Labs catalog for quick access. From there, you can add them to patient plans, edit them as needed, or adjust them for individual patients to streamline workflows and support consistent care.
Create a custom panel
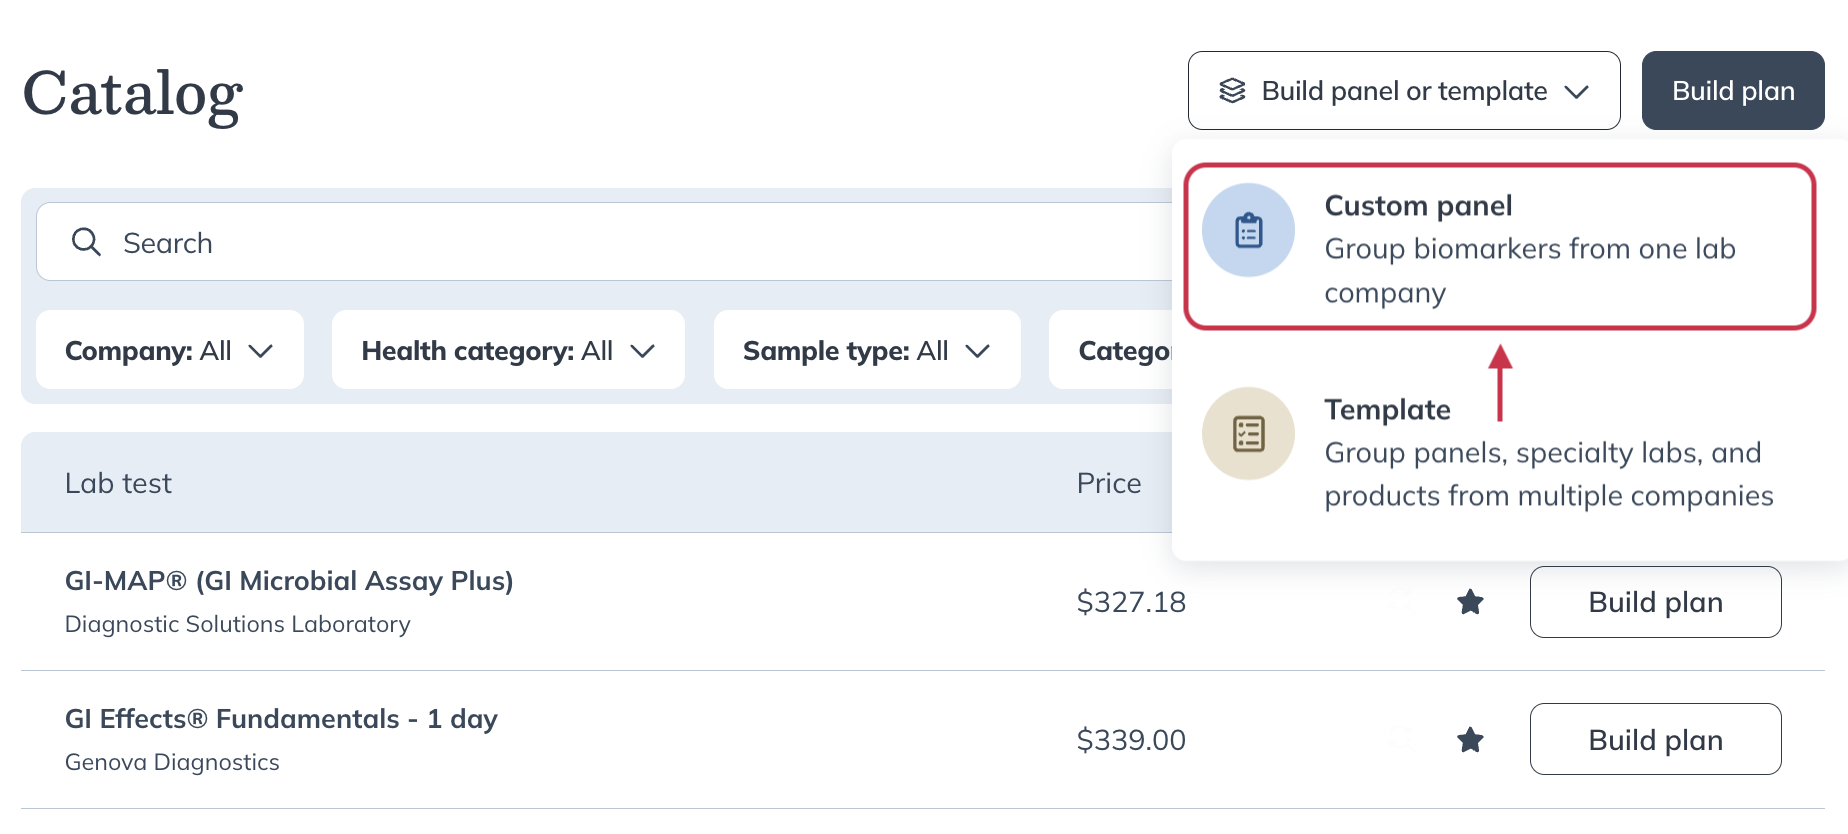
To create a custom panel:
- From the left-hand navigation, click Labs, then select Catalog.
- Click Build panel or template, then select Custom panel.
- Use the search bar to find the biomarkers you want to include in the panel. You can also filter by company, health category, sample type, or favorites.
- Click Add to panel next to each biomarker you want to include.
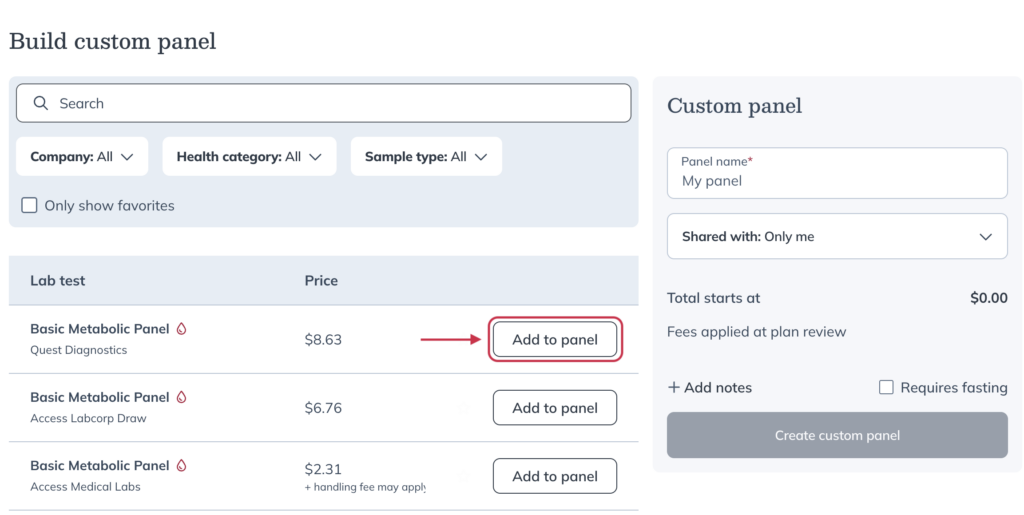
- Give your custom panel a name.
- Use the Shared with dropdown to choose who can view this custom panel.
- Add notes or check the Requires fasting box if needed.
- Click Create custom panel when you’ve finished making changes.
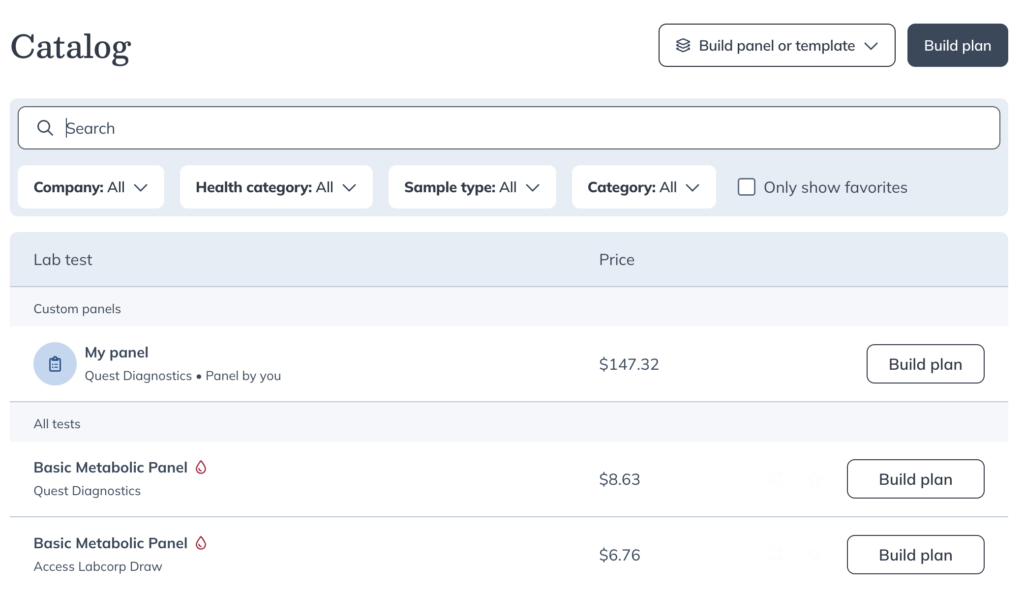
After you’ve created your custom panel, it will appear at the top of the Labs catalog under the Custom panels heading.
Apply a custom panel to a new plan
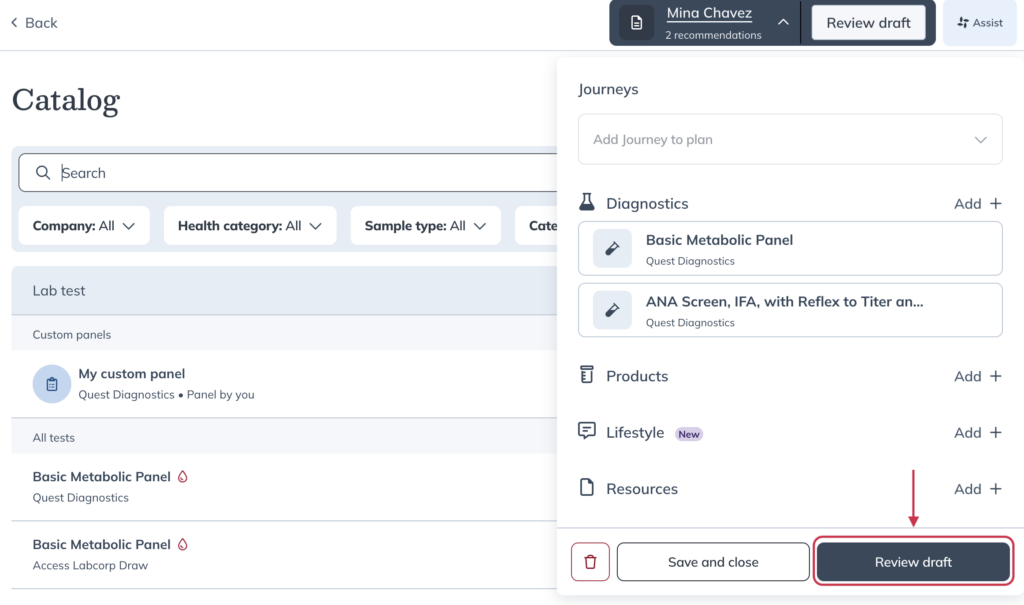
To use a custom panel in a new plan:
- Go to the Labs catalog.
- Click Build plan next to the custom panel you’d like to use.
- Search for your patient, or create a new patient, then click Next.
- Make any changes needed to the plan, then click Review draft.
- On the Review plan page, click Send to patient when you’re ready.
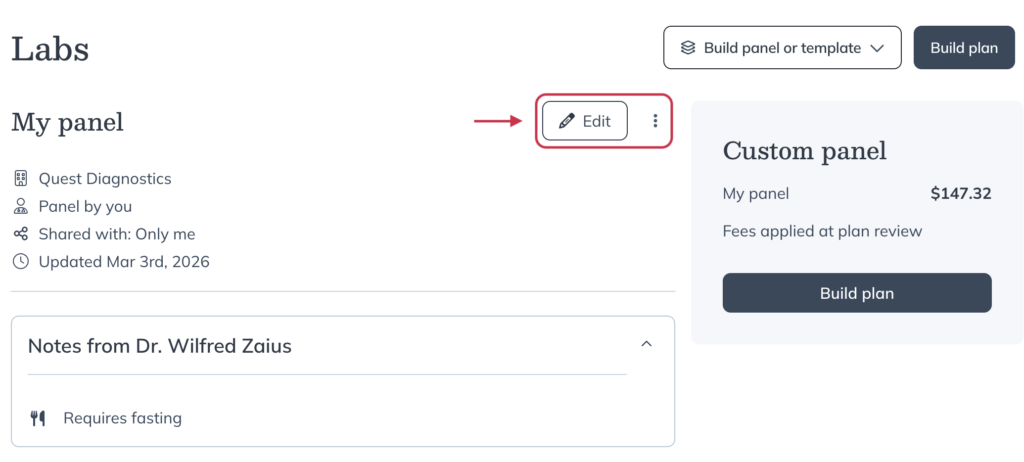
Manage a custom panel
To view and edit a custom panel:
- Go to the Labs catalog.
- Click the custom panel you’d like to edit.
- Click the Edit button to make changes, or select More options (⋮) to delete the custom panel.
Video: Creating a custom panel