
Practitioners and staff can upload external lab results directly to a patient's profile. Fullscript uses AI-assisted parsing to extract biomarker values from supported files, which you can review and edit before they're saved to the patient's record. Uploaded results don’t include AI-generated interpretations, supplement recommendations, or other lab planning features.
Before you begin
Before uploading a lab report, make sure:
- The file is a PDF, JPEG (.jpg or .jpeg), or PNG.
- The document is clear and easy to read.
- The file opens correctly on your device.
Upload an external lab result
To upload existing results:
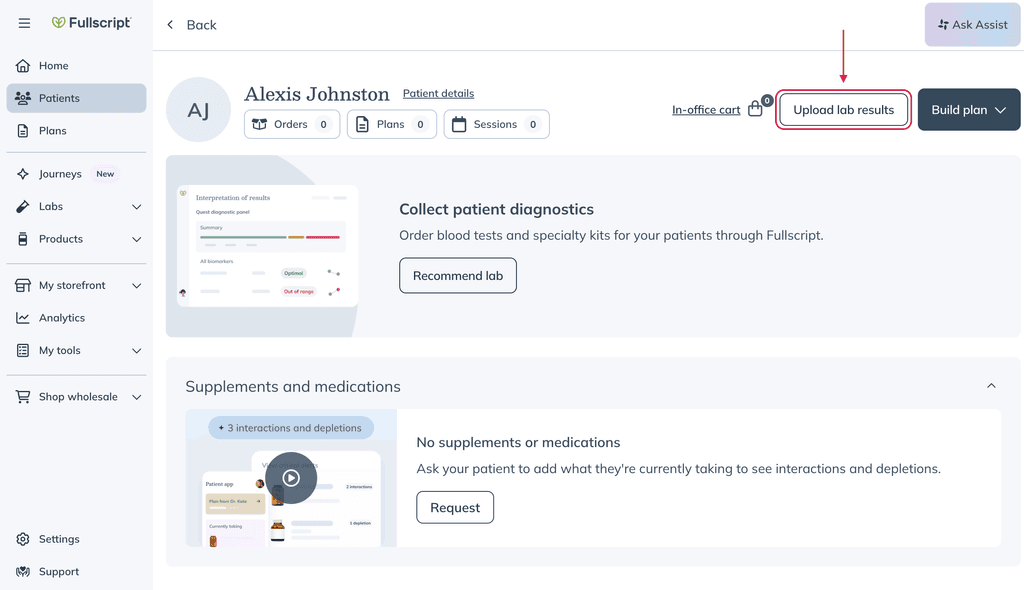
- From the Patient tab, search for and open the patient's profile.
- Select Upload lab results.
- Select a supported file from your device.
- Review the selected file, then select Upload lab results.
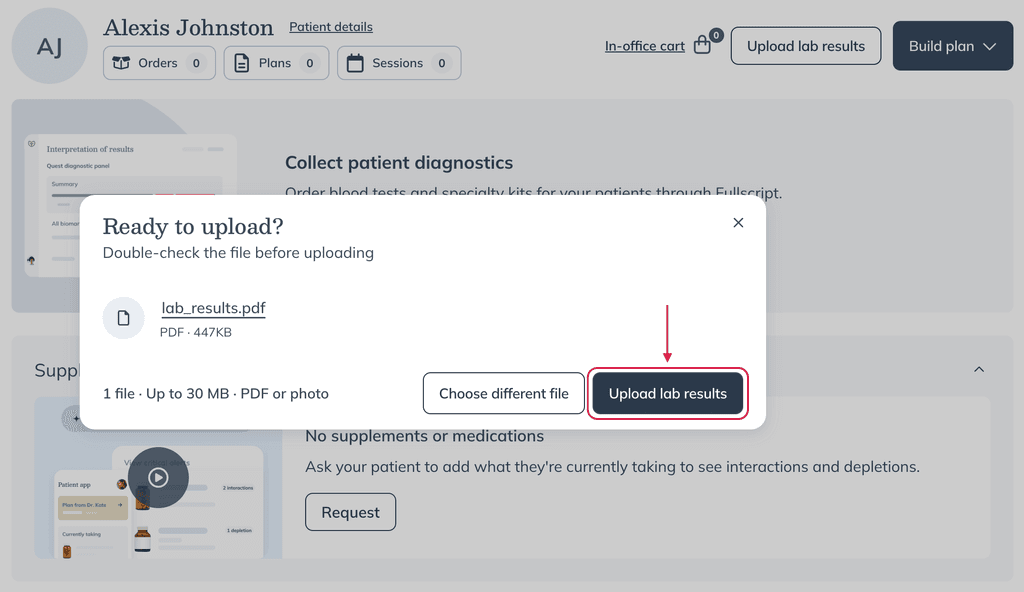
- Wait while Fullscript processes the report and extracts biomarker values.
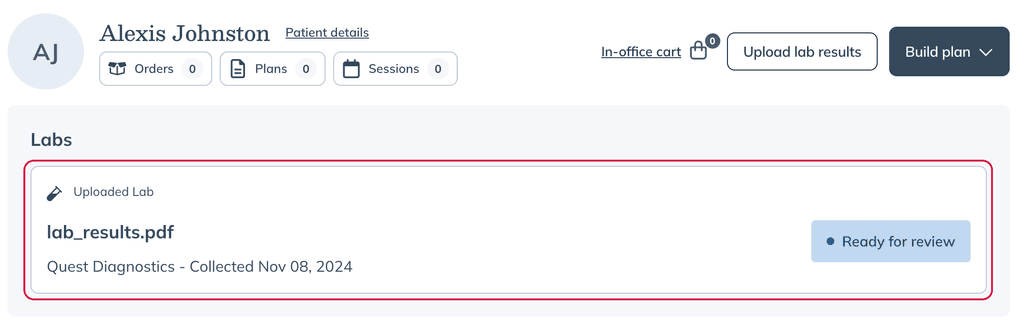
- Once your results are finished processing, you'll see a Ready for review status. Select Ready for review to review and confirm the uploaded results.
Review extracted results
After Fullscript finishes processing the report, review the extracted lab information and biomarker values before saving them to the patient’s record. Only confirmed results are saved.
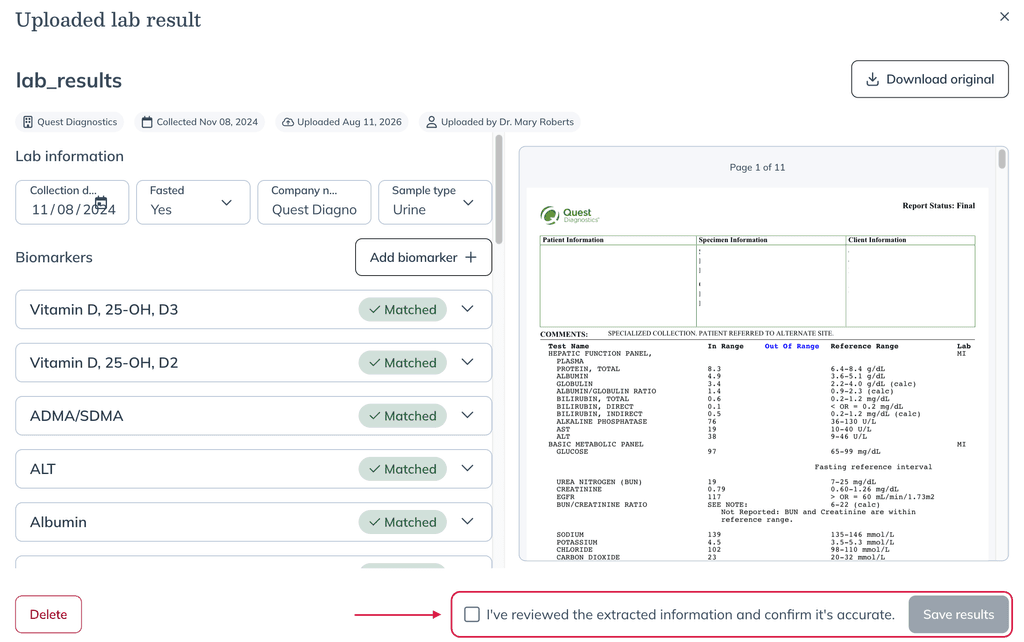
- Review the extracted information and compare it with the original lab report.
- Correct any information that wasn’t extracted accurately. You can also add a missing biomarker using the Add biomarker + button.
Fullscript uses AI-assisted parsing to extract lab information and biomarker values. Compare the extracted information with the original lab report and correct any errors before saving.
Once you confirm and save the results, they’re immediately available to the patient in their patient portal. Patients won’t receive an email or SMS notification.
- Select the confirmation checkbox to confirm that you’ve reviewed the extracted information and that it’s accurate.
- Select Save results, then select Yes, confirm to save the results to the patient’s record.
Where your uploaded results appear
Once you've confirmed and saved uploaded results, the biomarker values are added to the patient's record and appear in the patient's Trends grid on their profile, alongside results from other lab sources. Trends shows a patient's biomarker history across all lab sources in one grid, so uploaded results sit next to Fullscript-ordered and other results for the same biomarkers. Use the Body system dropdown to group biomarkers in the grid.
Ranges for uploaded results
Each result is shown in the grid in the unit it was reported in. Fullscript-ordered results are shown against Fullscript's optimal and standard ranges. Uploaded external results usually don't carry a Fullscript range, so in the grid they fall back to whatever range the original lab report included for that biomarker.
If the original report didn't include a range for a biomarker, the value is still saved and shown in the grid, but without a reference range beside it.
This is why an uploaded result may show no range when a Fullscript-ordered result for the same biomarker does.
Edit saved lab results
If you need to make changes after saving the results, open the uploaded lab result and select Edit. Edit permissions are based on your account's patient profile permissions. Users who can modify patient profiles can also edit uploaded lab results.
The lab results page shows when the results were last edited and who made the change.
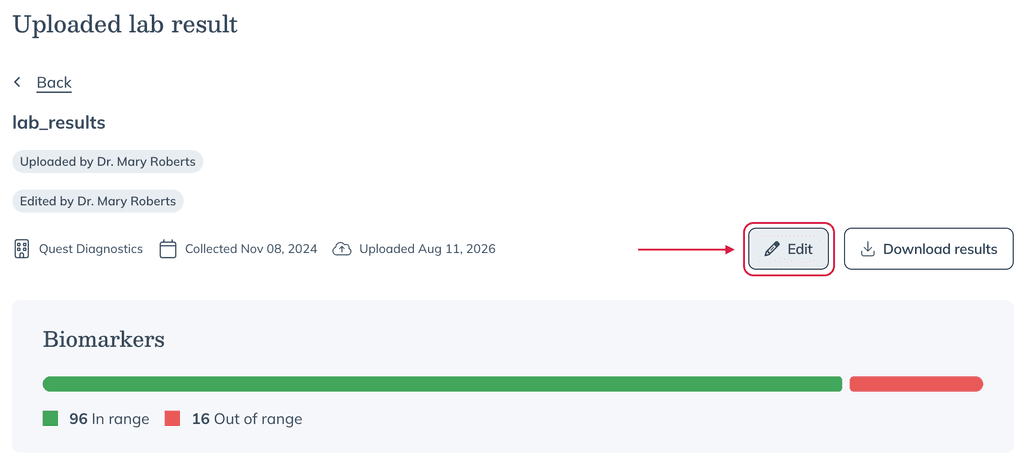
Selecting Edit from a saved lab result.